
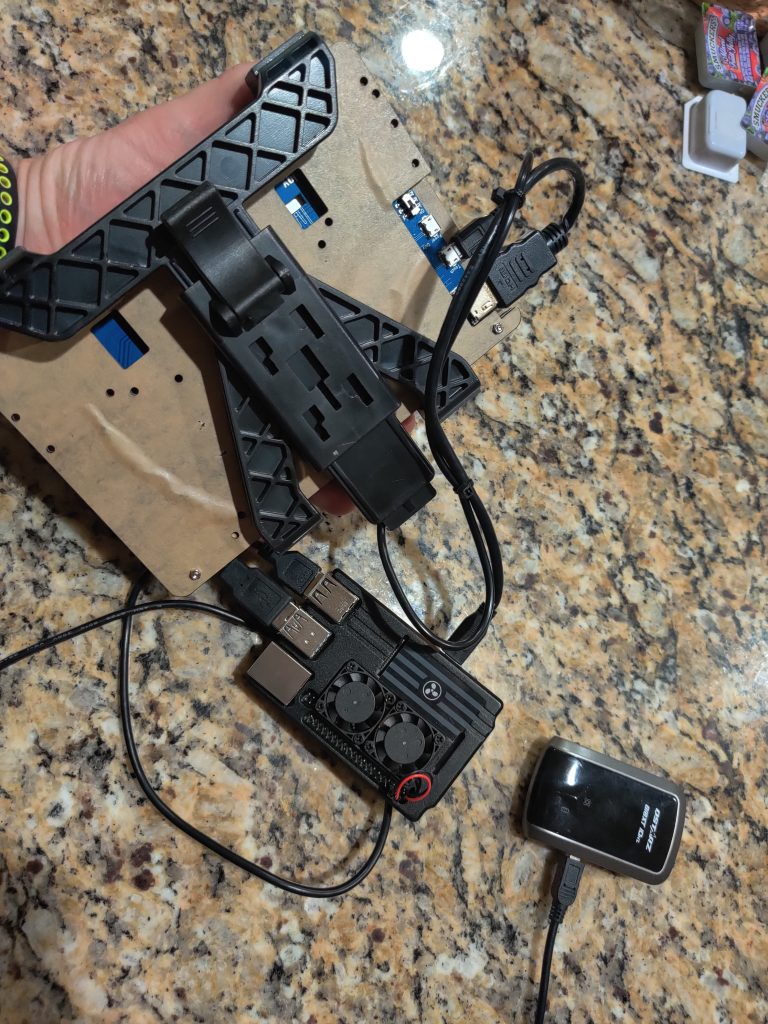
What I’m trying to do is make it super easy to get your PiDash on your network so you can download logs, upload a new tune, upload a new dash you bought/designed etc. Here is a demo of it working in my Turbo Camaro.
One thing to note is, TunerStudio saves the date/time in the filename. Since the date/time is not correct on my PiDash or yours unless you have a Real Time Clock installed, it shows the wrong date in the filename. This can be confusing. I recommend copying your logs off of the PiDash and deleting them off of the PiDash once you finish copying.
- Category Archives Raspberry Pi
-
-
Updates to the PiDash ready for download
Next version of the PiDash 04/23/2020. Why pay $250 or more when you can get it for cheaper with a little bit of elbow grease?
There will be more changes to the .img files as new ideas are thought up. I’ll create new posts when a feature is added along with a changelog.
My rig: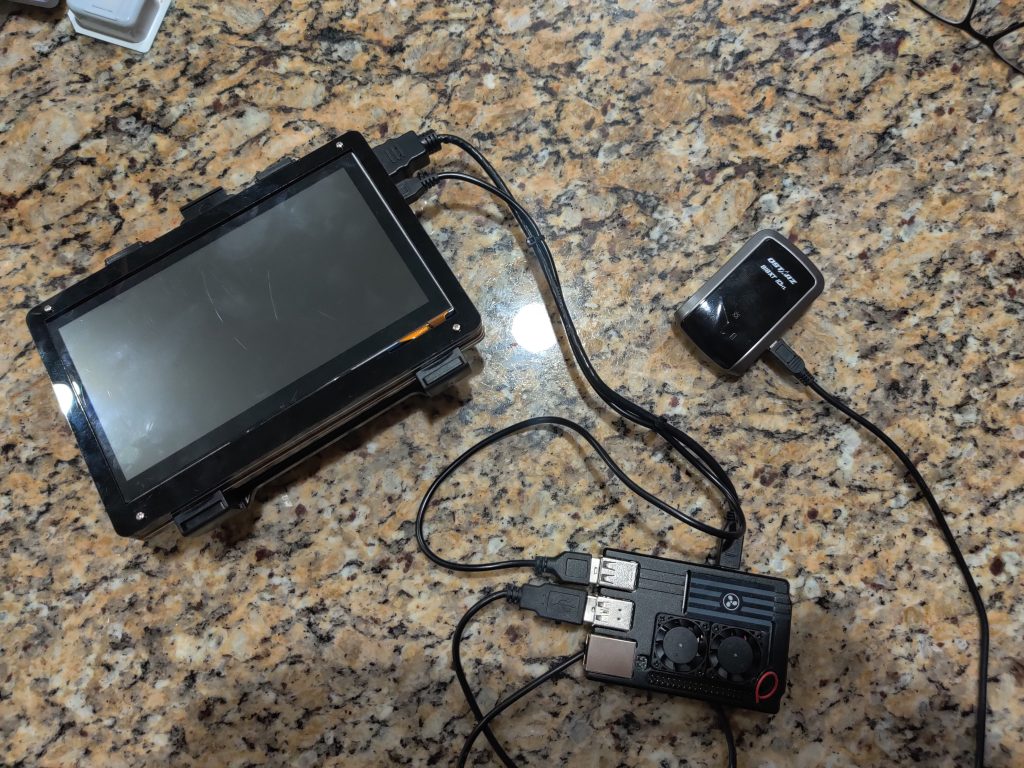
Requirements:
Raspberry Pi4 (2GB version is fine) $45
16gb microSD card $6
Longrunner 7″ touch screen $62
Windshield mount (if thats what you’re doing) $15
Raspberry Pi4 aluminum case with dual fans $25
Optional:
10Hz GPS $70
Changes:
1. Installation of DietPi with only LXDE and Java.
2. LXDE does NOT autoload.
3. Runs TunerStudio Beta demo version using X11.
4. On exit of the beta version, PiDash will automatically shut down*
PLEASE GO TO THE PIDASH WIKI PAGE. THIS POST IS OUT OF DATE.
If your display doesnt work when booting, its because the config.txt on your image needs to have the correct settings in there for your display. Comment below and I’ll walk you thru it or build an image that will work. Please provide which display you’re using or the settings your display needs.
NOTES:
Default username: root
Default password: dietpi
You can change this if you want from the command line.
*If you exit TunerStudio, it will automatically shut down your PiDash. If you register TunerStudio ULTRA you can create a button that will exit, assuming you have a touch screen or a mouse hooked up. Its better/easier/less hassle if you use a touch screen. Here is the one I am using which is on AMAZON.
REGISTRATION/ENABLING TunerStudio:
If you already have TunerStudio registered, you will need to enable it.
Pre-requisites for NON-ULTRA USERS:
1. Tuner Studio shuts down on exit. If you want that feature, skip step 2.
2. If you DO NOT want your NON-ULTRA version of TunerStudio to shut down automatically on exit go to the TunerStudio ULTRA users portion. That part explains how to remove the auto shutdown on exit.
3. Need to enable networking, skip to the Enabling networking section.
TunerStudio ULTRA users, I will ASSUME you will create a button or something that you can click or touch to shut down your PiDash:
**IF YOU PURCHASE TS Ultra, I believe only the BETA version has this shutdown feature. If so, you will need to log in and do the following to disable my shutdown after exit since you will be using a button or similar to shutdown:
cd /var/lib/dietpi/dietpi-autostart
nano custom.sh
This will bring up an editor. Remove the line at the bottom that says the below. That is a shutdown command.
init 0
CTRL X to save.
Press Y to save and then RETURN when it gives you the filename, do not change that name.
Once out of the editor, reboot by typing this:
init 6
Do not forget to create a button or similar in Dashboard Designer and assign the “single click” to shut down.
Enabling networking for all TS Users:
Plug in your network cable. Power on the PiDash. TunerStudio autostarts. You will need to jump to a terminal session. Get your keyboard out and press and hold CTRL-ALT-F1 keys. The screen will turn black with a bunch of text. Hit return once.
Default username is: root
Default password is: dietpi
Once at a prompt type the following:
systemctl start systemd-timesyncd
systemctl enable systemd-timesycd
systemctl daemon-reload
Once complete, type:
dietpi-config
Select option #7
Select Ethernet and hit return
You will see a message stating Ethernet must be enabled.
Select OK and hit return.
Next prompt states “would you like to purge all wifi …”
Select OK
Stuff starts happening.
Select “Apply: Save all changes….” and hit RETURN
Do you wish to apply settings and reconnect.
Select OK to that prompt and the next wifi prompt.
Once you are back to the Dietpi Config screen:
Tab to “Back” and hit return. You will do this twice.
At the Main options screen select EXIT. At “Exit Dietpi-Config?” select OK.
You have now successfully enabled networking and timesyncd. Next command, restart the PiDash by typing:
init 6
After reboot, TunerStudio will load. Enter your registration info. Once complete, disable timesyncd and networking that way the system starts up quick again.
DISABLING networking for all TS Users:
Plug in your network cable. Power on the PiDash. TunerStudio autostarts. You will need to jump to a terminal session. Get your keyboard out and press and hold CTRL-ALT-F1 keys. The screen will turn black with a bunch of text. Hit return once.
Default username is: root
Default password is: dietpiOnce at a prompt type the following:
systemctl stop systemd-timesyncd
systemctl disable systemd-timesycd
systemctl daemon-reloadOnce complete, type:
dietpi-config
Select option #7
Select Ethernet and hit return
Select Disable: Disable Ethernet Adapter
Select OK and hit return.Next prompt states “would you like to disable ethernet …”
Select OKStuff starts happening and “Would you like to purge all WiFi…”
Select OK and hit RETURNOnce you are back to the Dietpi Config screen:
Tab to “Exit” and hit return.
You are now at “Exit DietPi-Config?”
Select OK
You have now successfully disabled networking and timesyncd. Next command, restart the PiDash by typing:
init 6After reboot, TunerStudio will load and you will see your registered version.
Next release:
1. USB automount that way you can save your Project to a USB thumbdrive and remove it on shutdown. *May skip this because of #2 below*
2. Wifi TunerStudio log/tune access via a Windows/Linux/Mac.
3. Better notes on stuff and things or if I get suggestions.
-
DietPi + Raspberry Pi4 + TunerStudio with speedups!
I’ve removed all of this since I build the image. Makes more sense to provide that.
-
Testing the PiDash in the Turbo Camaro
I bought a 7″ tablet mount that suction cups to the windshield. Wanted to see if this PiDash would work well in my Turbo Camaro. Because of the lack of depth I cannot get the PiDash exactly center mounted but thats ok. It’ll replace my gauges so all I need it to do is hold on and not fall off. Another issue is heat from direct sunlight. If its 100* or more outside, I doubt I’ll be driving this monster around as it just gets too hot around here without A/C. LOL.
Here’s a pic of the PiDash mounted. I had to pull over at the gas station and edit the gauge spacing since RPM was overlapped and I wanted the AFR text a little bigger. It held up well going over bumps here and there. Pretty stable.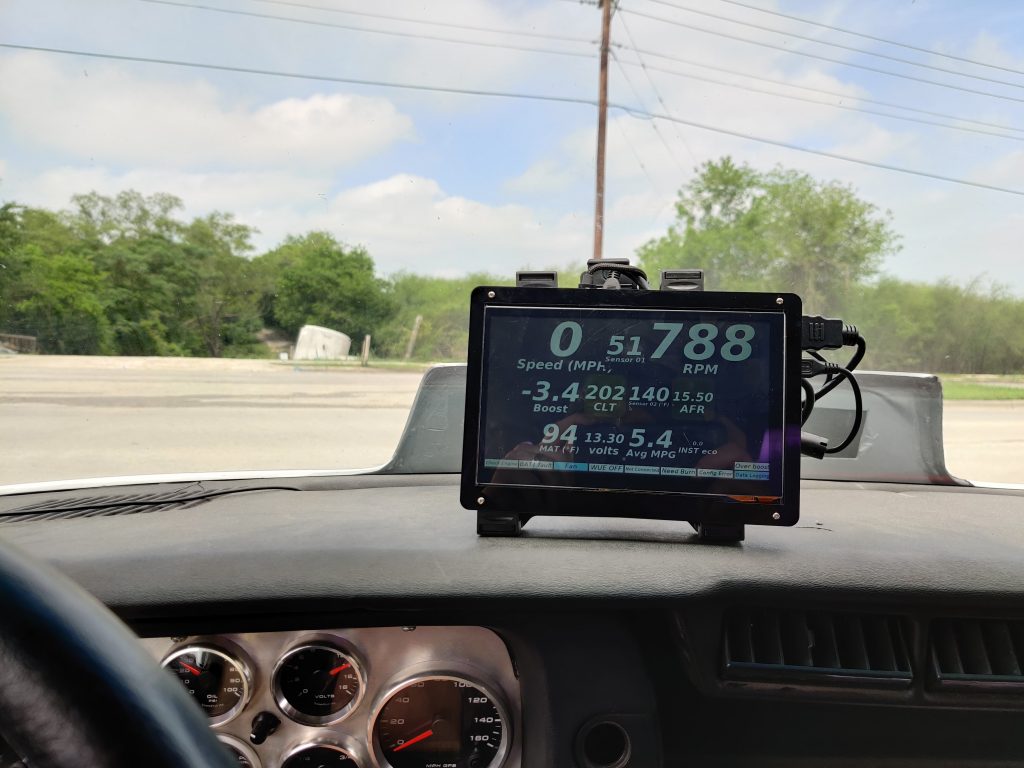
-
Finally getting around to that PiDash
Pretty much will sit right there. Ordered a 7″ tablet windshield mount from Amazon. I already have a 12V to 5V step down converter. Everything works when tested hooked directly to the ECU. Patiently waiting for my order to arrive.
-
Installing TunerStudio on Raspbian with autostart and push button clean shutdown!
NO LONGER SUPPORTED. GO TO THE WIKI AND DOWNLOAD THE LATEST IMAGE.
I have removed all notes on how to do this. Please download the ready-to-use image.
Thanks
-
Raspberry Pi Dash
If you’re like me, the default gauge package you install is probably real gauges. I’m running the SpeedHut gauge package that was around $700 or so with a GPS speedo.
With technology and an ECU like the one I’m running, the EFI Source Gold Box you’re able to run TunerStudio and take advantage of making your own gauges or modifying the gauges that come with it. TunerStudio is written in Java, so most newer operating systems like Linux and Windows are able to run this natively. Hell, you can even replace ALL OF YOUR GAUGES for about $135.
Here comes the Raspberry PI. Its a small computer that many have used for things such as retro-gaming, small computing and various projects. What I’m doing is setting up a Raspberry Pi 3B+ with a 7″ touch screen display, 64GB microSD card, Raspbian Linux, GPS and of course, TunerStudio.
In one pic you’ll see my gauges in full screen mode. I’ll make a video reviewing this setup soon.
Here are some pics: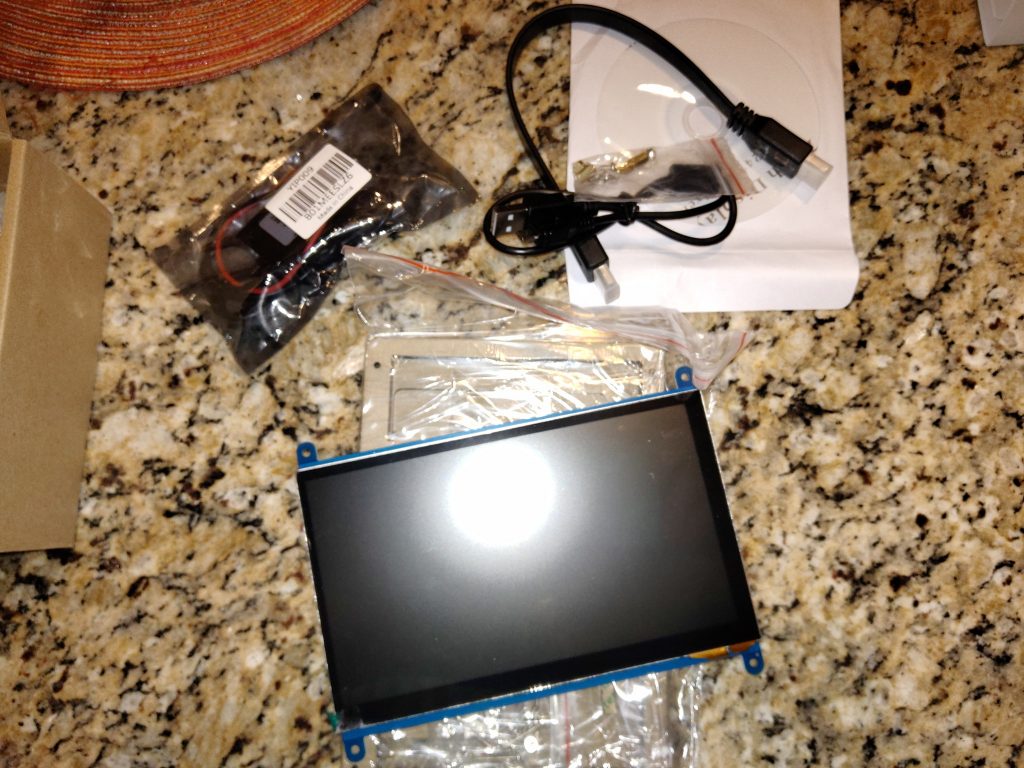
7″ Touchscreen 1024×600 display, car power supply. 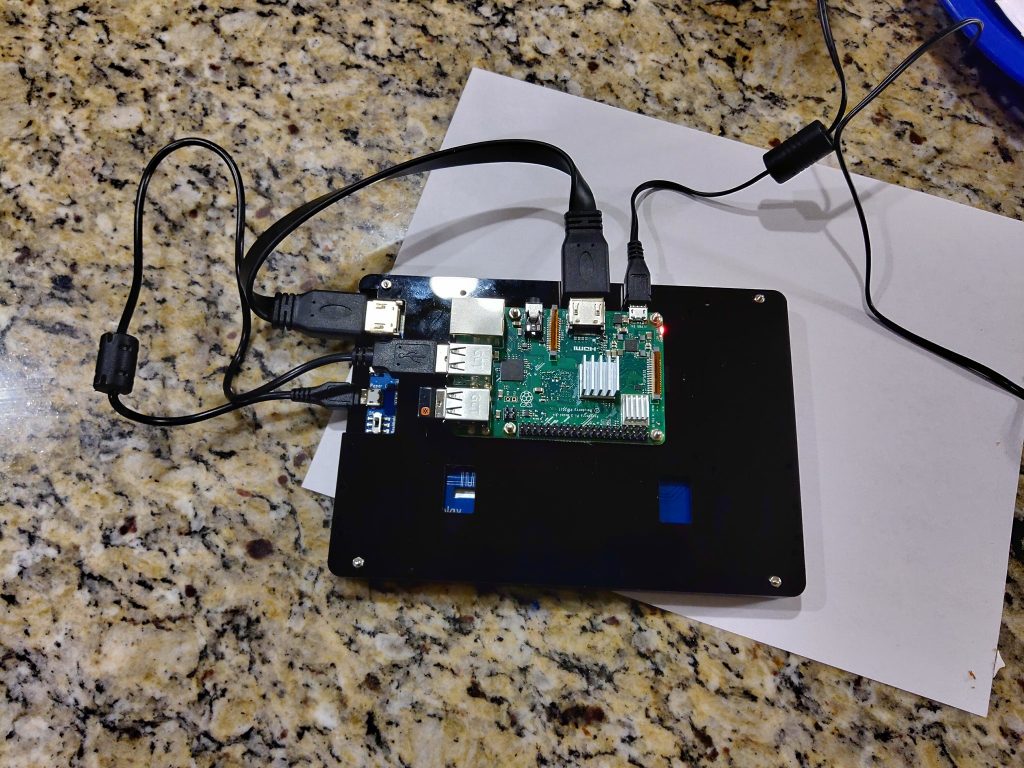
Raspberry Pi 3B+ 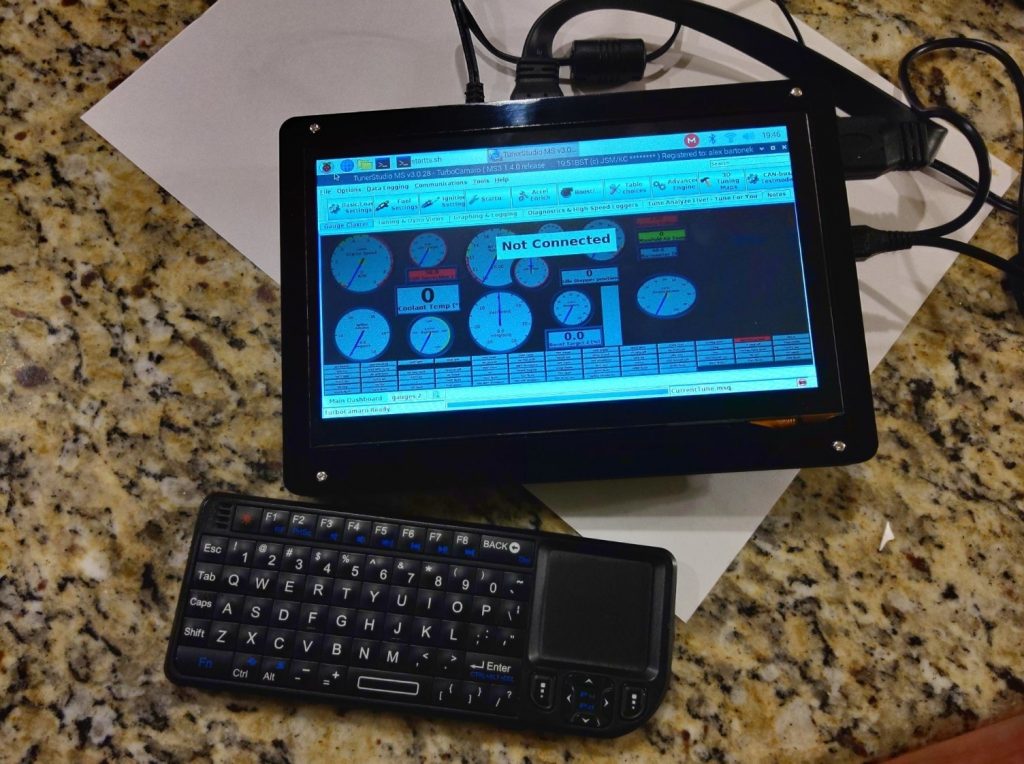
TunerStudio running under Raspbian Linux and a small USB keyboard/touchpad combo. 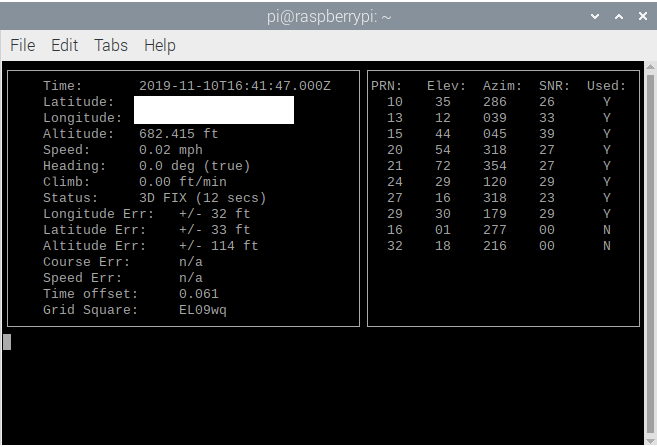
GPS Configured! 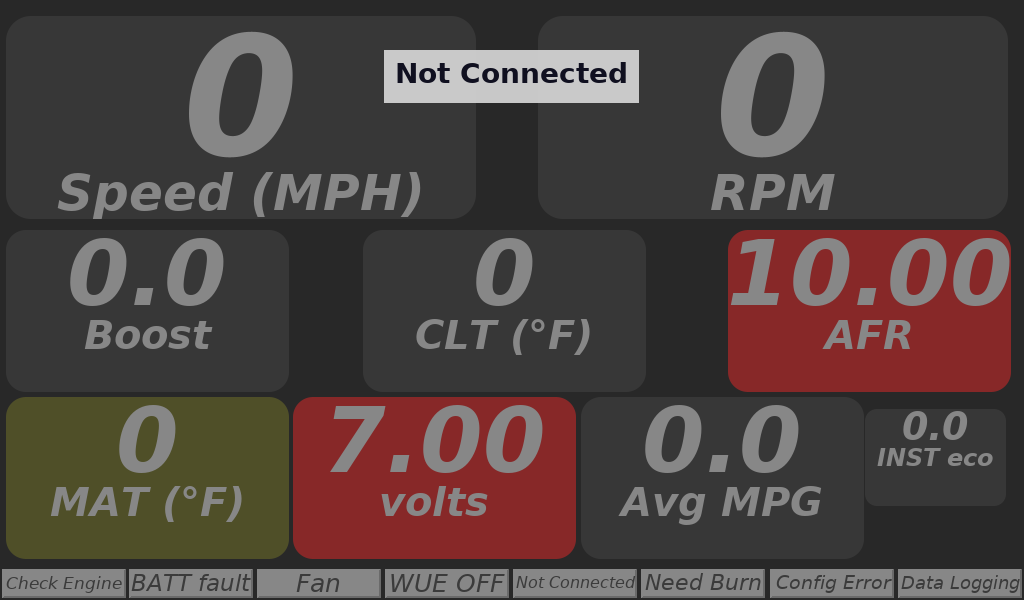
The current dash I’ll use in TunerStudio 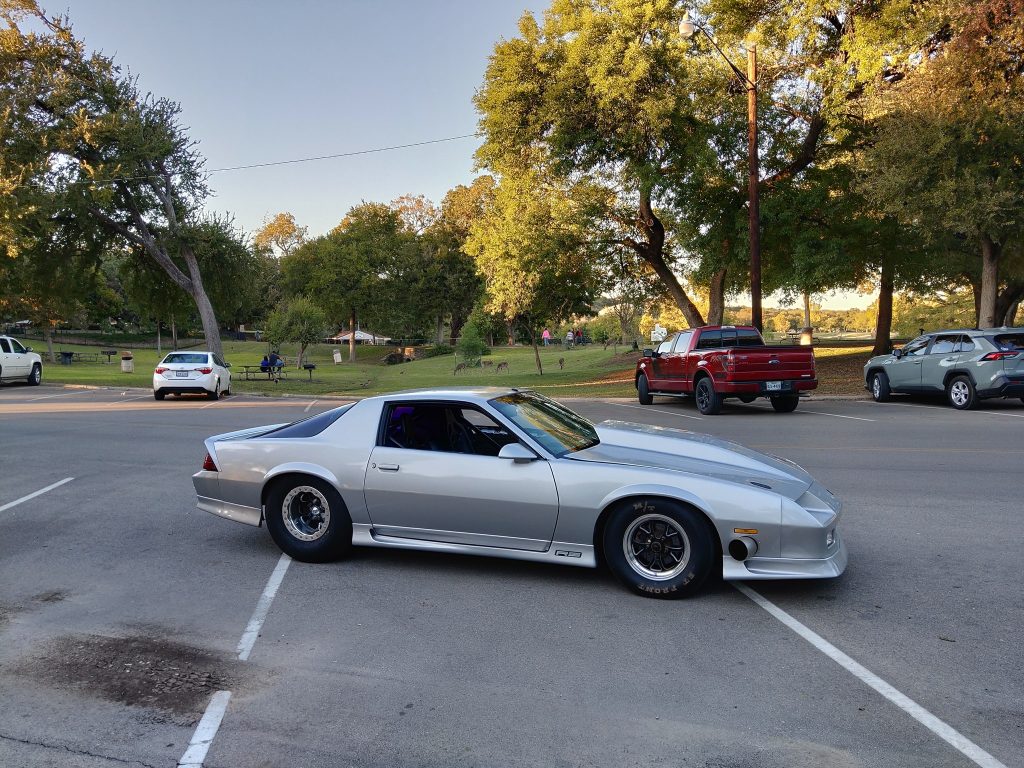
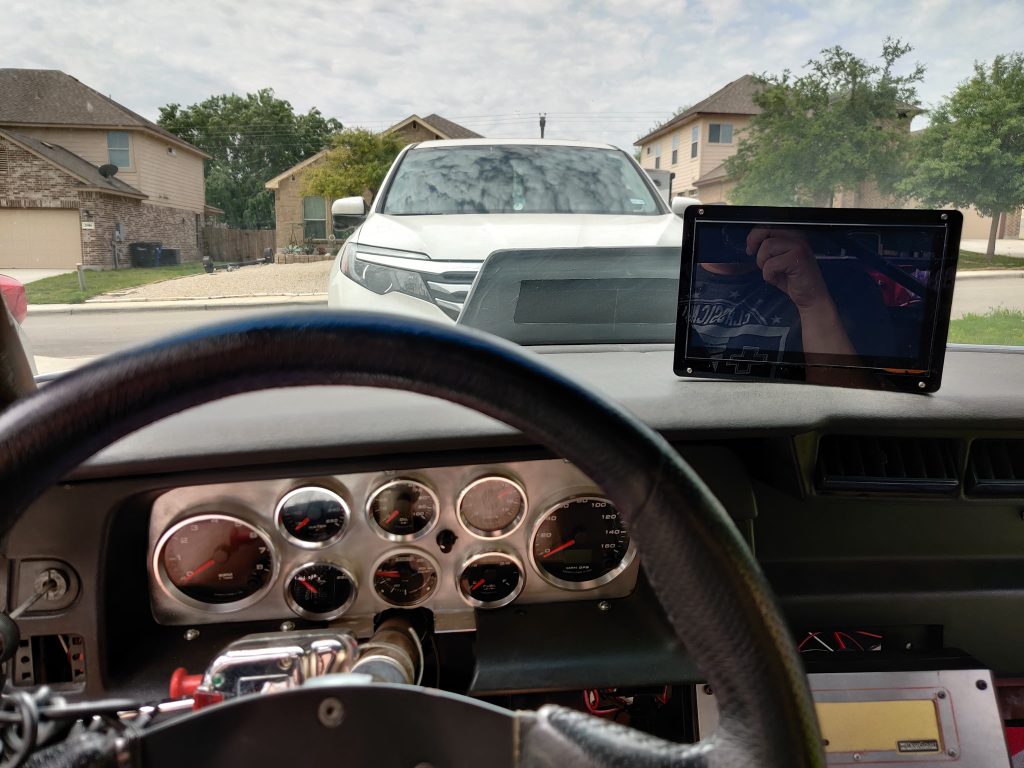
Crusing around town in my Turbo LS powered Camaro!