Initial Requirements
DISCLAIMER: This software is provided without any warranty expressed or implied. Use of this software is all on you bud.
There may be bugs that I need to fix, so check back regularly for updates.
Please check on my Facebook page for the latest news. This site is updated last with news.
First and foremost you need to read what you need when it comes to hardware. Read this first!
SPECIAL NOTES: Speeduino Serial
These instructions are based on Mega code for the NexGenEFI Digital Dash Community Edition and Speeduino 0.4.4d (It should not matter what version Speeduino you have).
You will require the Seeed Studio CANBus Shield 2.0 even though you are using Serial. The SD Card slot on the Shield is utilized to save various settings for the screen.
Important note – you may have issues with secondary serial when you are connected to TunerStudio via USB. Note also that some user designed boards already use the secondary serial for Bluetooth connections. Before embarking on the project check that your secondary serial is free for use.
Ensure that secondary serial is enabled via TunerStudio (Default is off). The only setting change required is to turn on the secondary serial, other settings in the window should be left as is. See here: https://wiki.speeduino.com/en/Secondary_Serial_IO_interface. It should be noted that what Speeduino thinks is secondary serial is actually serial 3 on the mega.
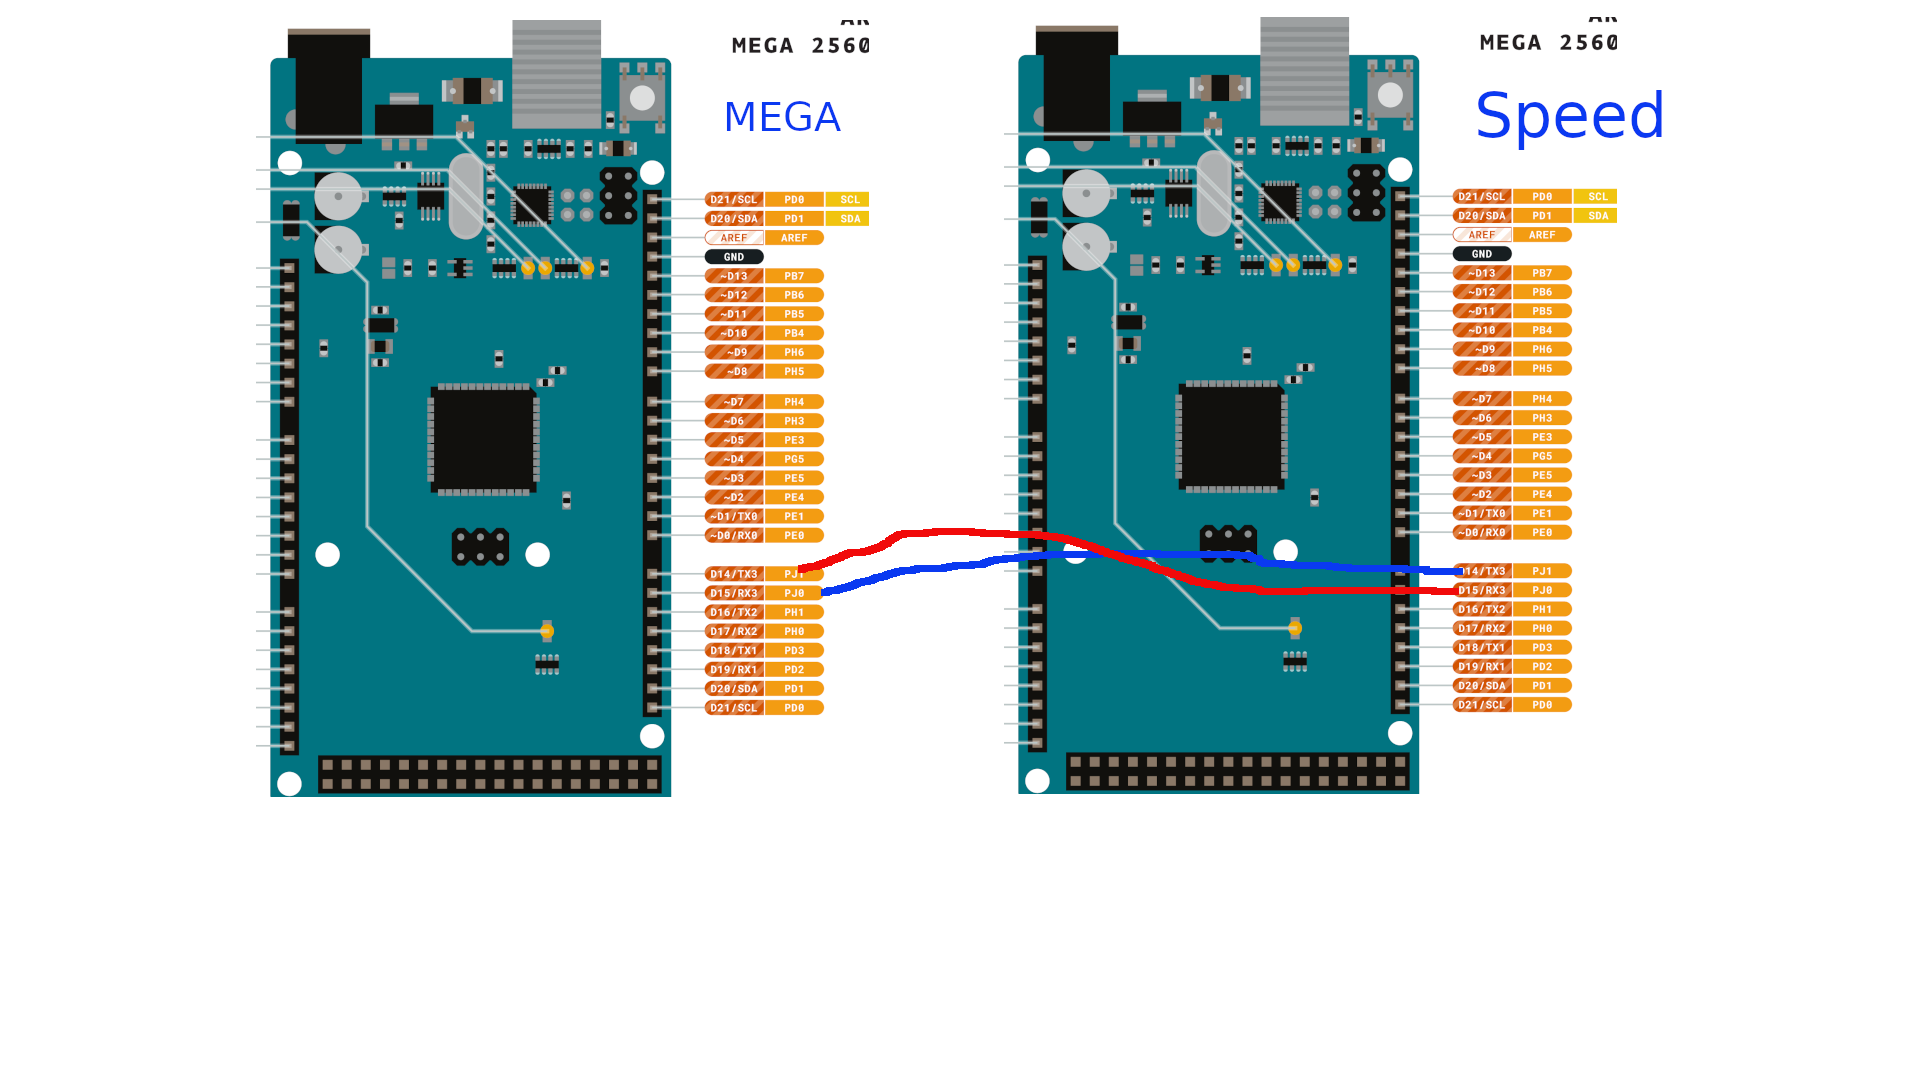
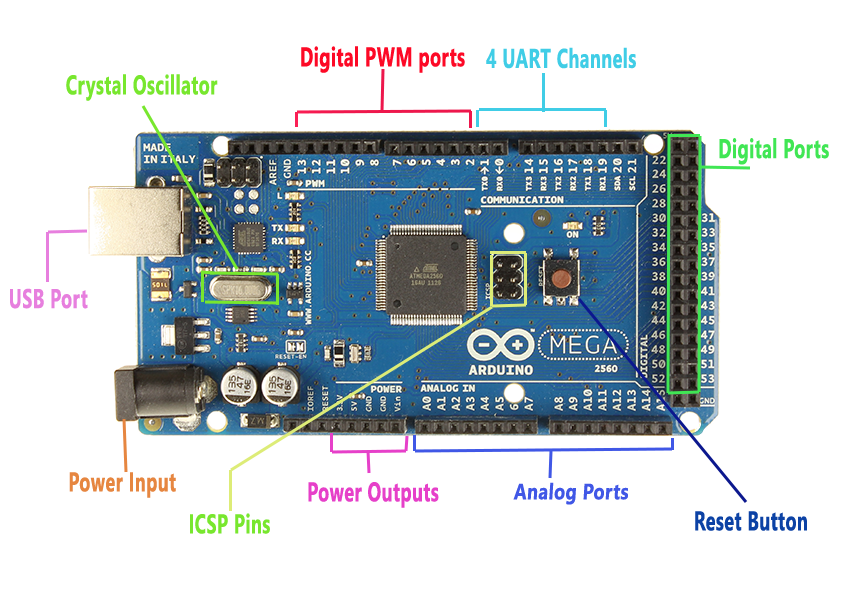
No official Speeduino boards break out the serial 3 pins on the Mega to the Speeduino board. This mean that you will have to direct connect to pins 14 and 15 on the mega. Generally easiest to solder wires to the rear of the Mega and provide flyleads.
Connect as follows:
NexGenEFI Digital Dash Mega Pin 15 to Speeduino Mega Pin 14.
NexGenEFI Digital Dash Mega Pin 14 to Speeduino Mega Pin 15.
Follow the rest of the instructions below.
Software Requirements
Download AVRDUDESS for Windows, if you’re using Windows. This is to upload the compiled dash to the Arduino.
Clicky here to get it.
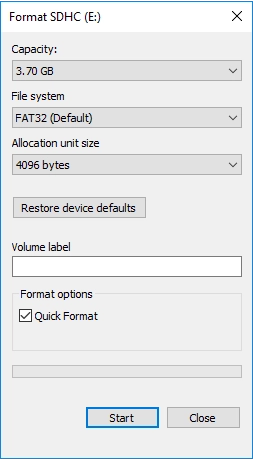
Format your microSD card for the Nextion software
Buy a MicroSD card and Format it in Windows to FAT32. Basically put in your Windows machine, select Format.
Where you’re at right now
1. You have your hardware.
2. You’ve installed AVRDUDESS which enables you to copy the compiled NexGenEFI Digital Dash Community Edition to the Arduino Mega.
3. You’ve formatted a microSD card which you’ll copy the NexGenEFI Digital Dash Community Edition layout to.
Download the NexGenEFI Digital Dash Community Edition version
NexGenEFI Digital Dash Community Edition Downloads Page
Download the Nextion Display layout
NexGenEFI Digital Dash Community Edition Downloads Page
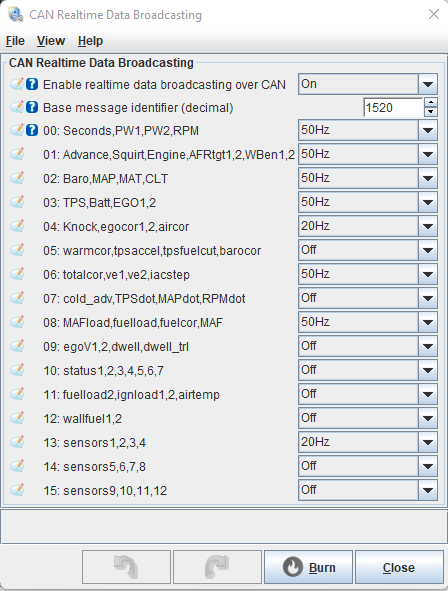
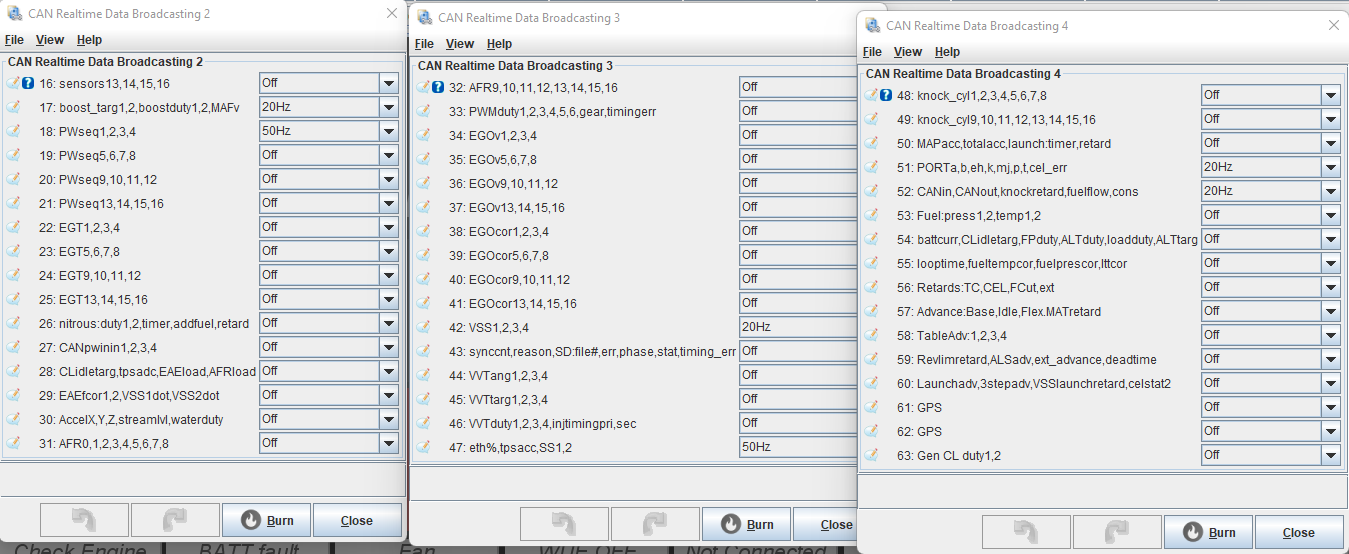
Configure CAN using TunerStudio (MS3)
We need to send data from the MS3 box to the Arduino CANbus Shield. Change your settings to these. Ensure your base identifier is 1520.
Installing CANBus Shield onto the Arduino Mega
Very simple. It only plugs in one way. Look at my picture, look at what you have. Plug it in and ensure its firmly seated. I have a microSD card plugged into the CANbus Shield, ignore that. Look at the wiring harness that comes with the Nextion display. Same colors, plug into the same pins like in the pics.
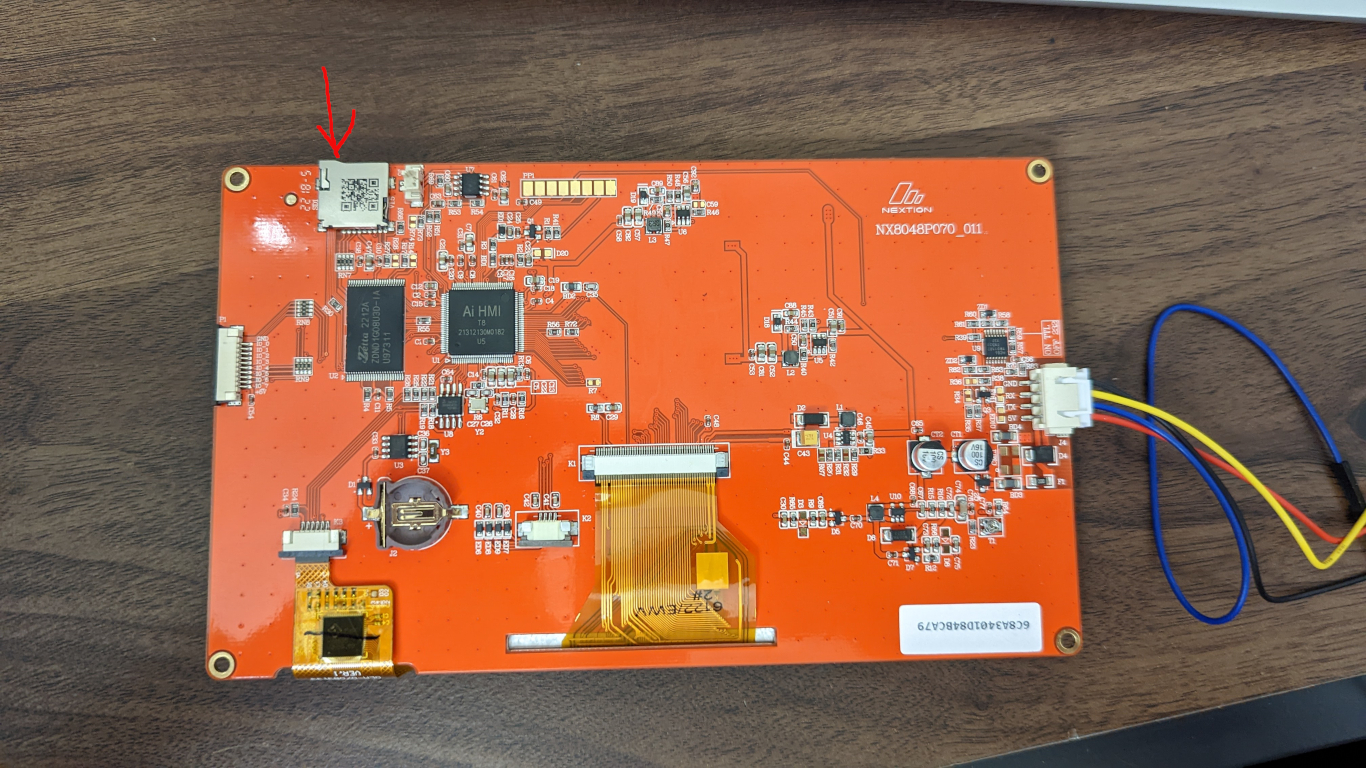
Wiring Display to the CANBus Shield
There are 4 wires to connect.
1. Red wire from the display to a 5V power source.
2. Black wire from the display to the GND.
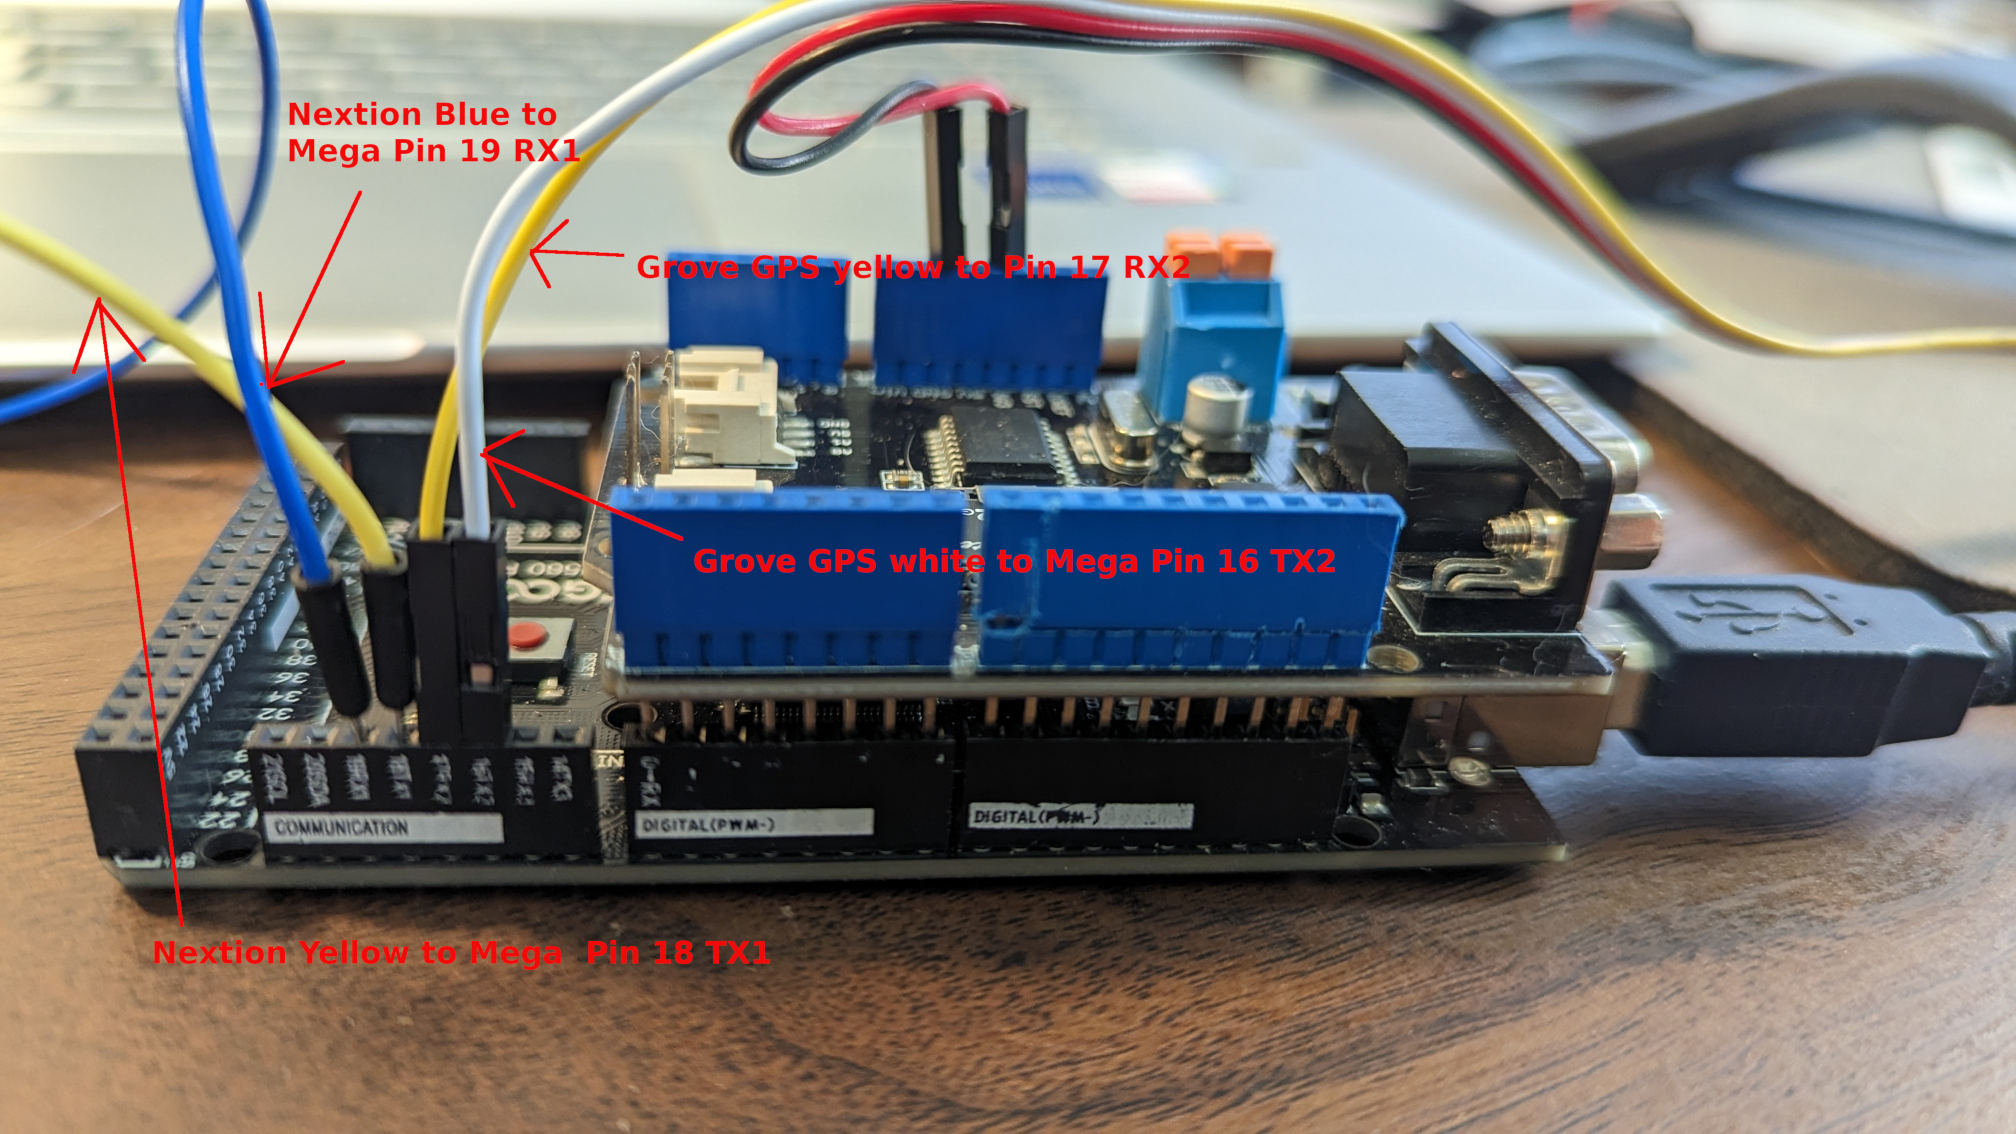
3. Blue wire from the display to the RX1 PIN 19 on the Arduino Mega board.
4. Yellow wire from the display to the TX1 PIN 18 on the Arduino Mega board.
You can add some hot glue to hold the pins in.
Grove GPS v1.2 connection to Arduino Digital Dash
See above pics.
1. Yellow from Grove GPS to Pin 17 RX2.
2. White from Grove GPS to Pin 16 TX2.
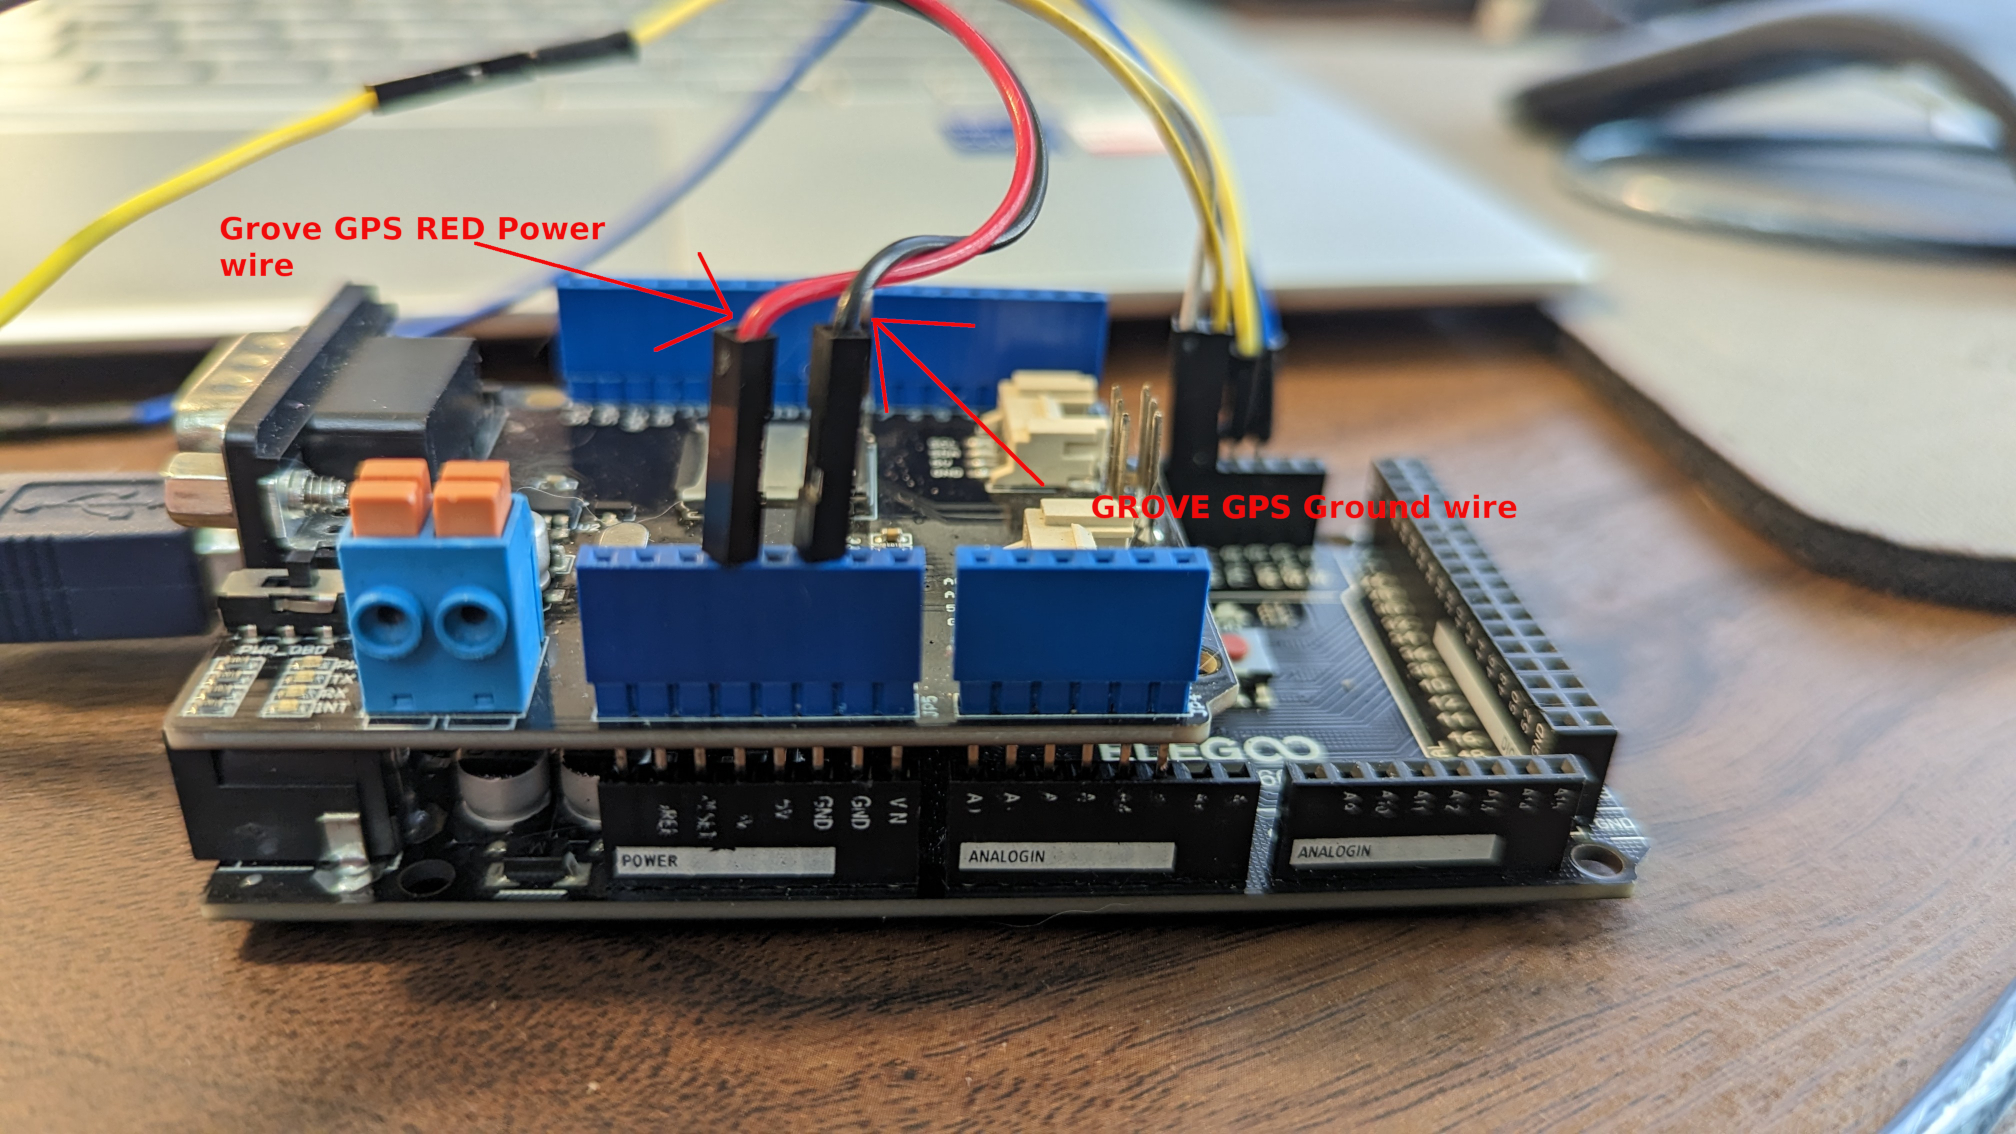
3. Red from Grove GPS to CANBus Shield 5V.
4. Black from Grove GPS to CANBus Shield GND.
Powering the NexGenEFI Digital Dash Community Edition
The Arduino Mega, Grove GPS v1.2, CANBus Shield 2.0 can all be powered off of the Mega. You will need to power the Mega via the barrel plug on the side as pictured below. Its a 5.5mm/2.1mm DC barrel plug, center positive, Recommended 9V-12V @ 2A.
USER FEEDBACK on POWER OPTION:
Power options are varied. He used a 12v-5v regulated supply to feed the NexGenEFI Digital Dash Community Edition Mega and the Nextion display itself from it. Connect to vin and GND on the Seeed Studio CANBus Shield 2.0.
OR the below. Just ensure you can get to the USB connection. This will be utilized to update the software when a new release is ready.
Installing the NexGenEFI Digital Dash Community Edition software
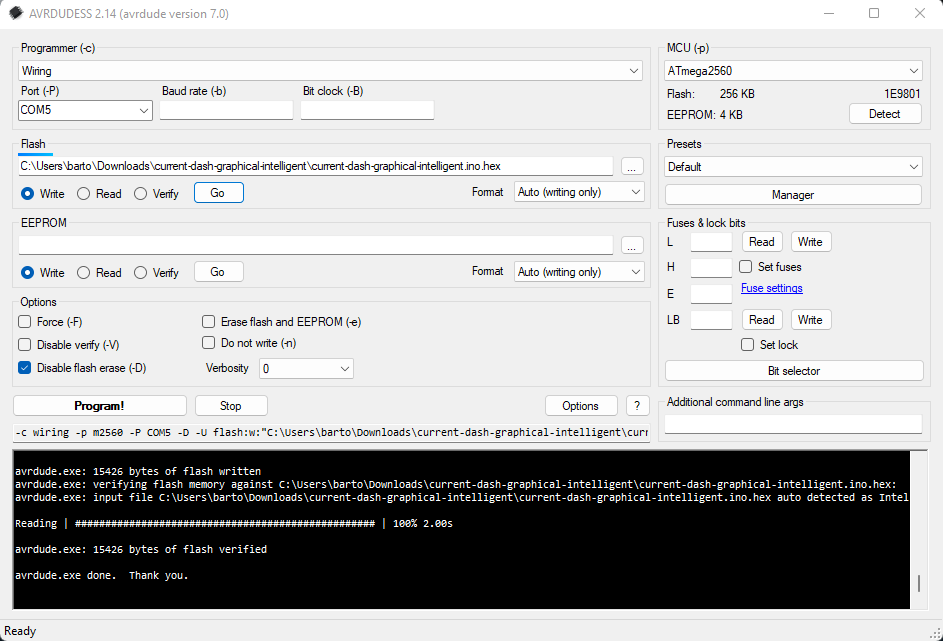
Open AVRDUDESS.
1. Select “Wiring” as the Programmer.
2. Ensure your Arduino is connected via USB to the laptop/computer.
3. You are connecting to COM1,2,3 or 4. NOT USB. This is a serial interface even though its connected via USB. Mine happened to be COM4, so I selected it.
4. On the top right for MCU, select AtMega2560
5. Flash. Click the 3 dots to the right and find the .HEX file you downloaded, select it.
6. Click GO. It will upload the code to the Arduino and you should see a similar message in the black box like I have in my screenshot.
7. Arduino is ready.
Copying Nextion layout
1. Insert that microSD card in and the .TFT file you downloaded earlier, copy it to the microSD card.
2. At this point, you have the display plugged into the CANbus Shield, everything is powered on.
3. Insert microSD card into the Nextion Display.
4. Unplug red wire from display that is connected to the CANbus shield.
5. Plug red wire back in.
6. Nextion display will say, uploading or whatever. It will copy the .TFT file to the display.
7. Once complete, remove microSD card.
8. Power cycle the Arduino and you should see the a layout.
9. Press the SHIFT LIGHT and CONFIGURE your ECU, Warning lights and DEFAULT Layout. If you dont, the dash will not function properly. At the time of this writing, I may create defaults if there are none. Double check them.
Connecting to the MS3 / Speeduino CANBus / OBD2
CANL to CANL on the CANbus Shield
CANH to CANH on the CANbus Shield
Start up your car!