• Got some work done on the turbo bracket

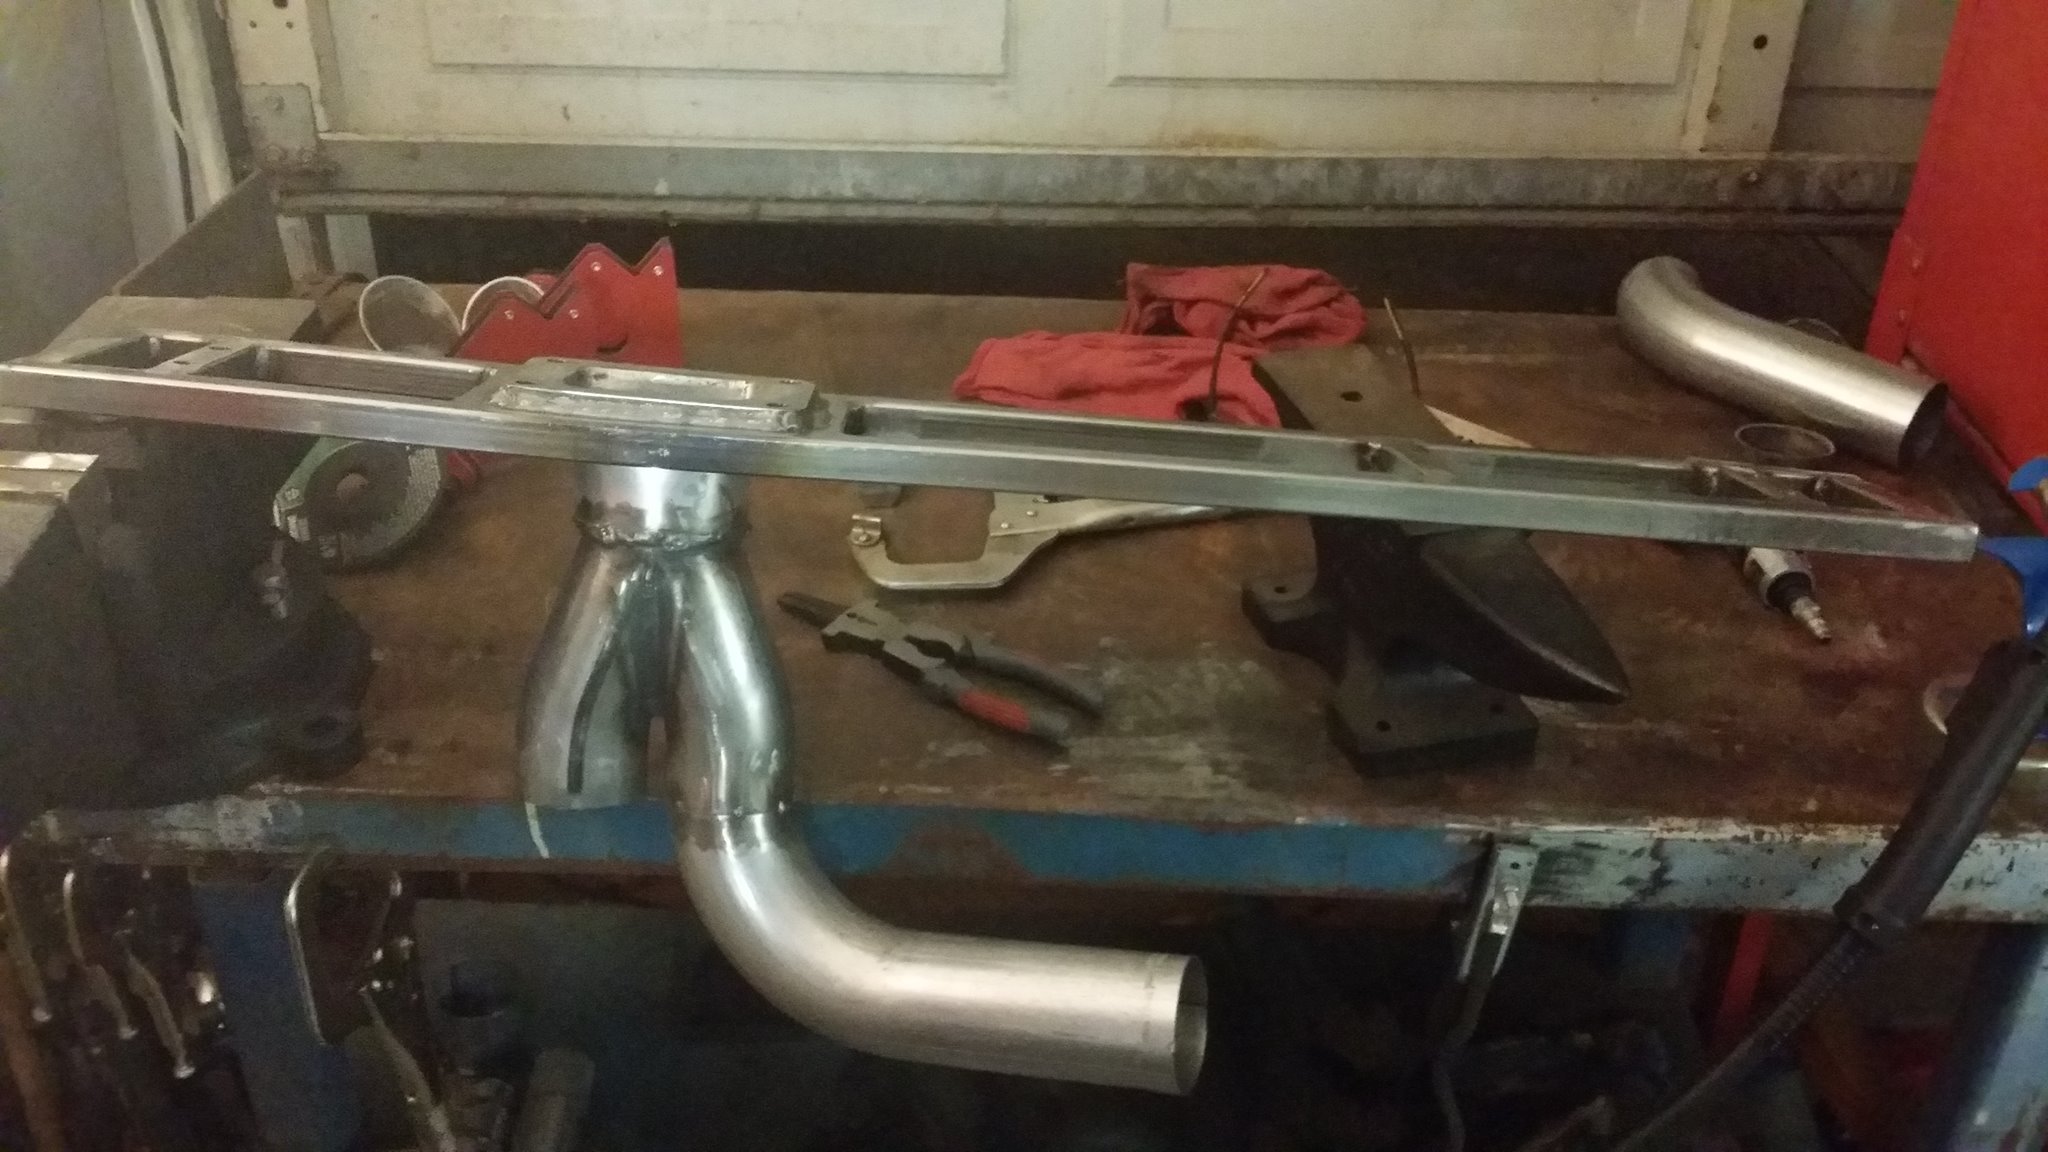
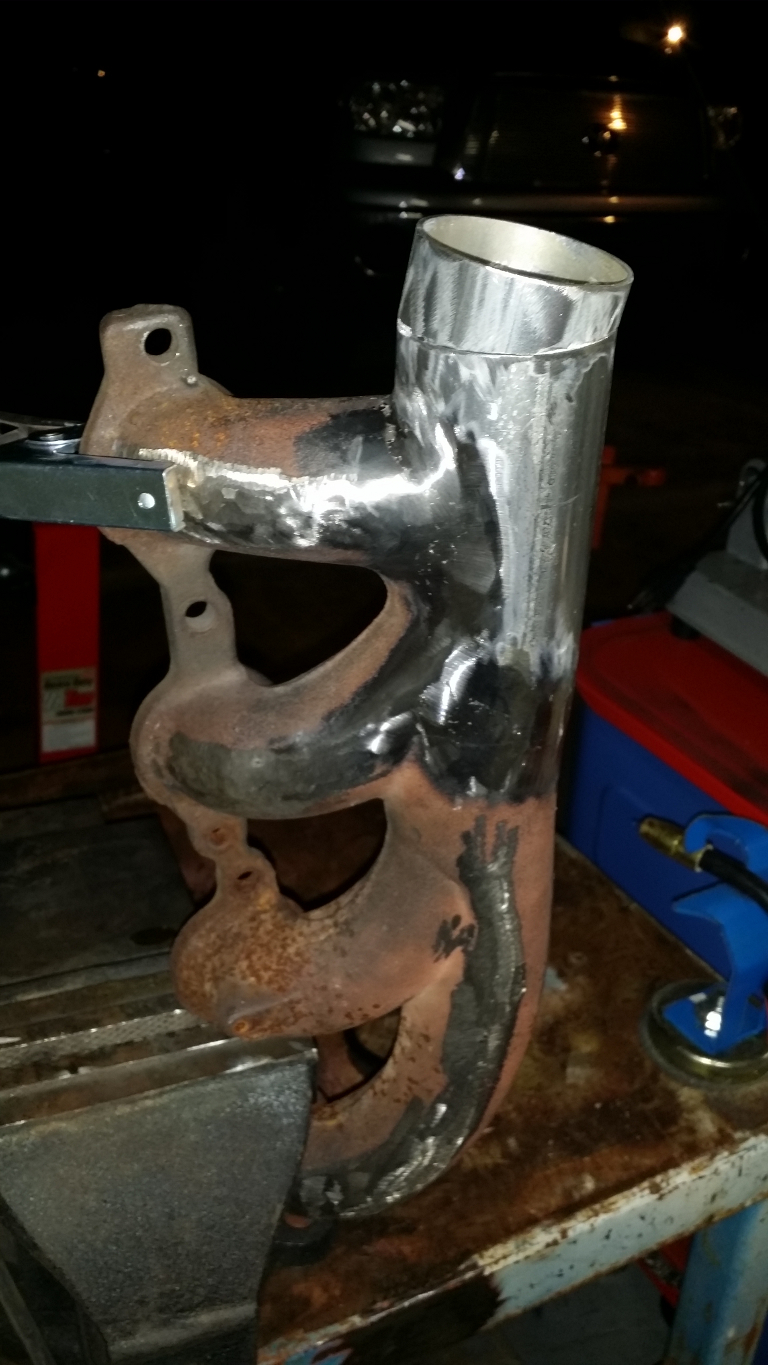
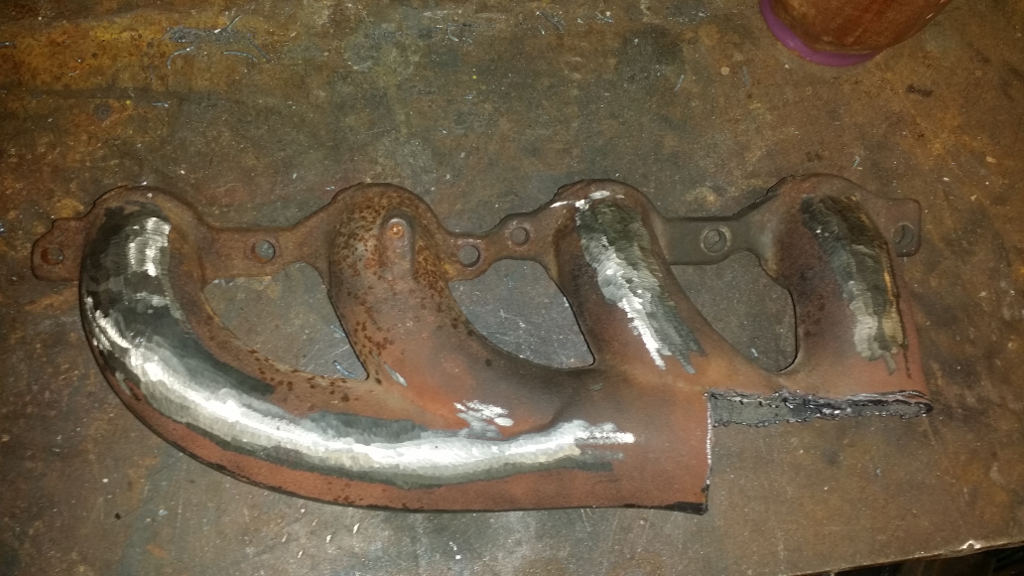
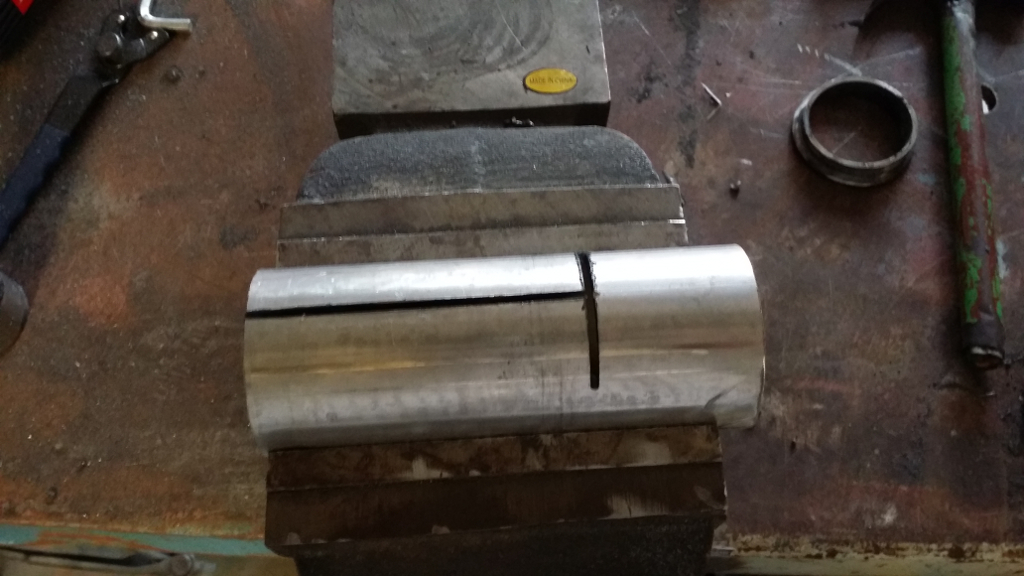
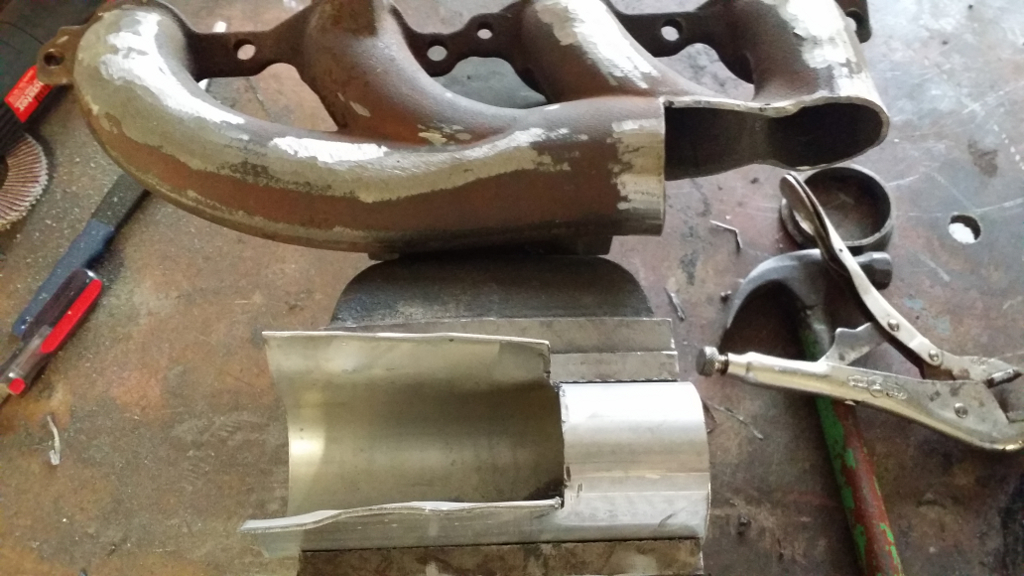
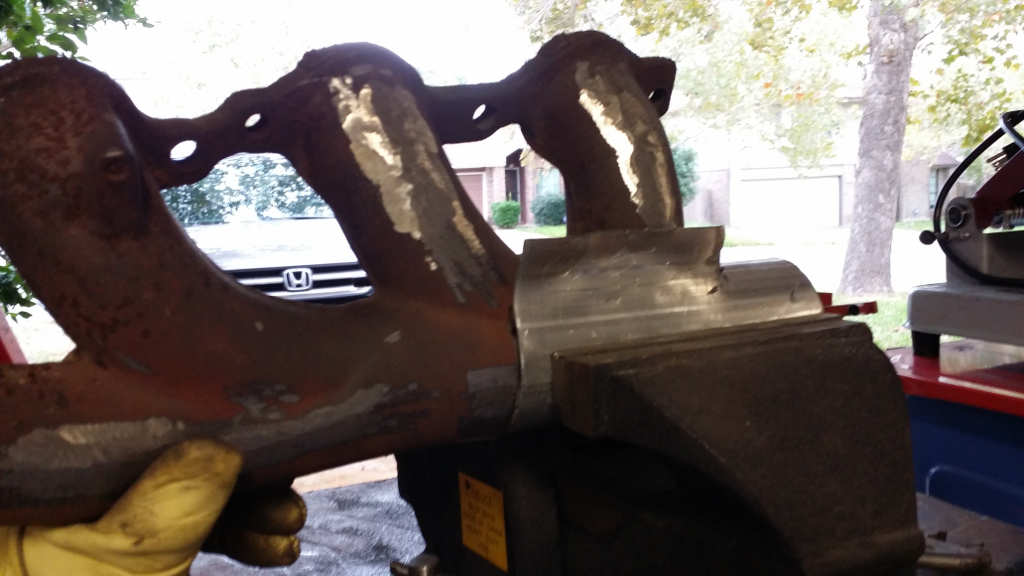
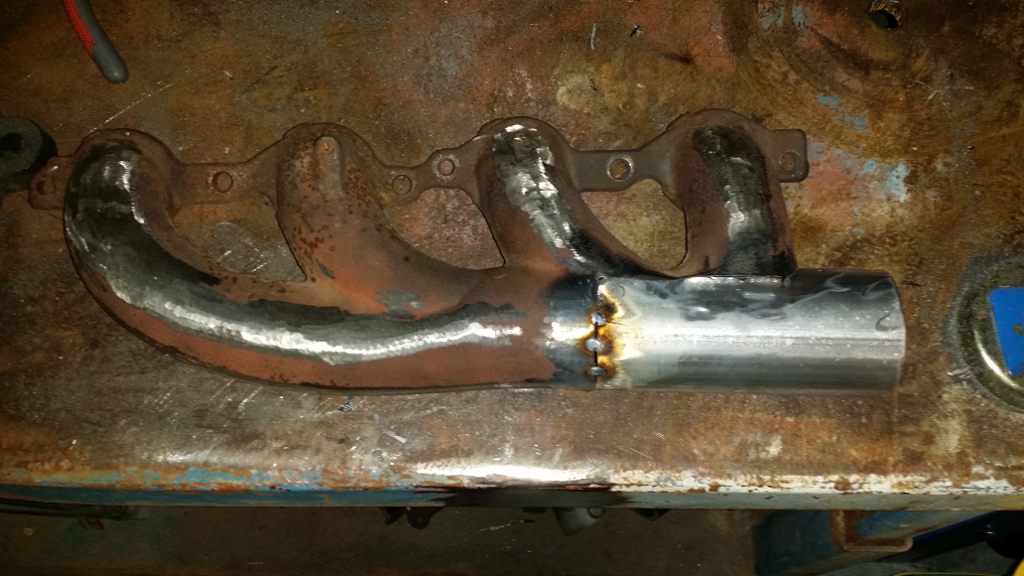
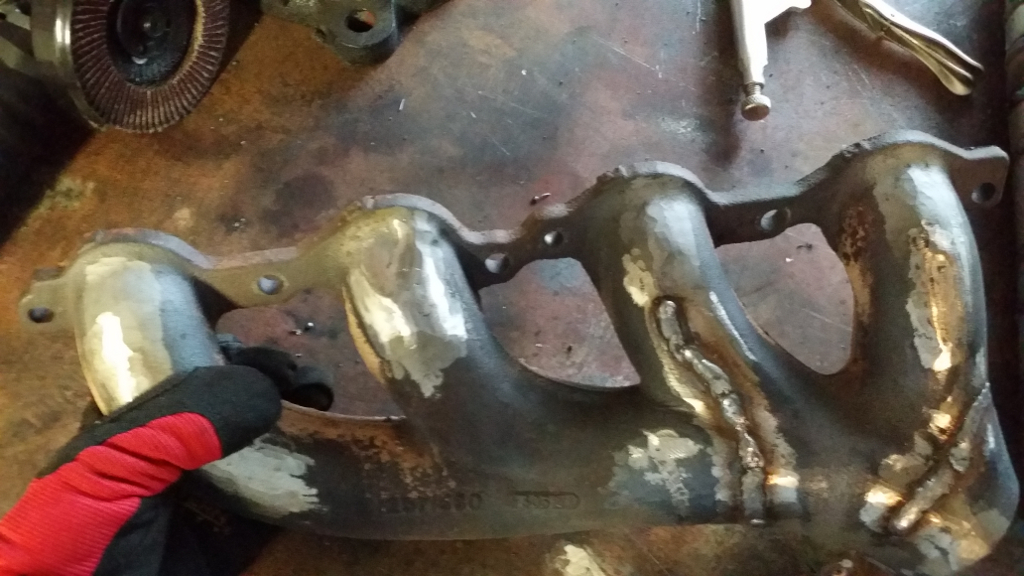
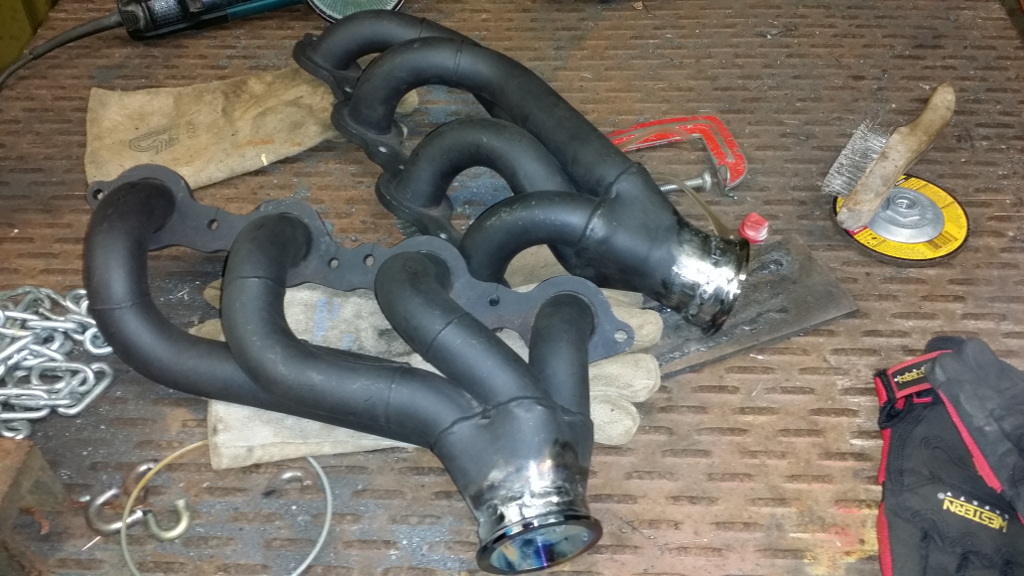
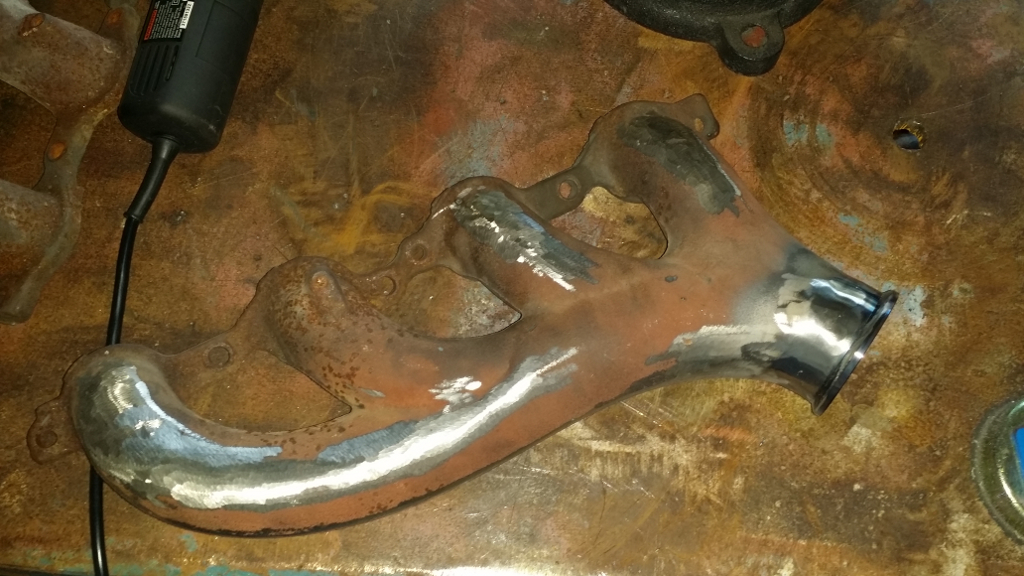
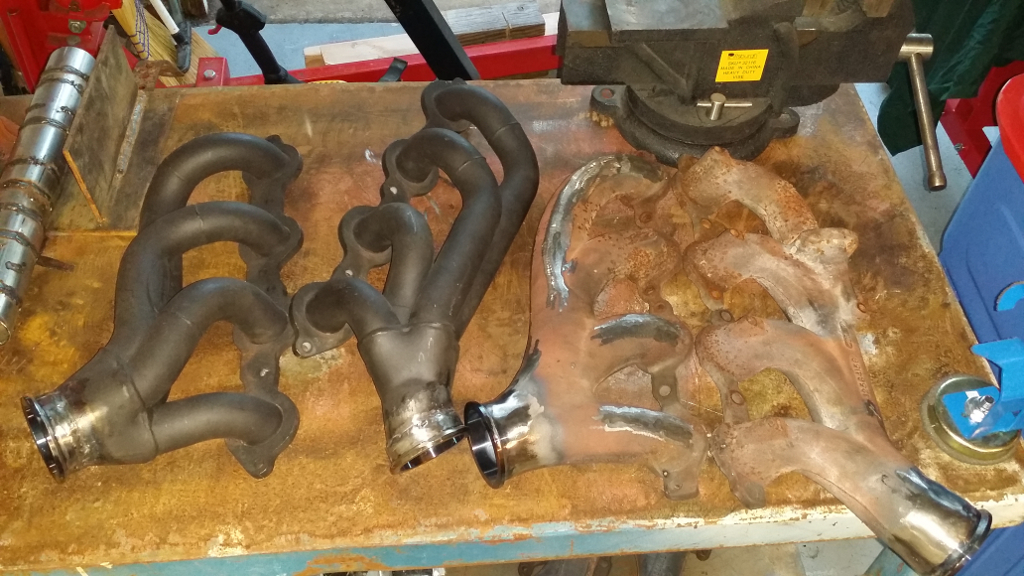
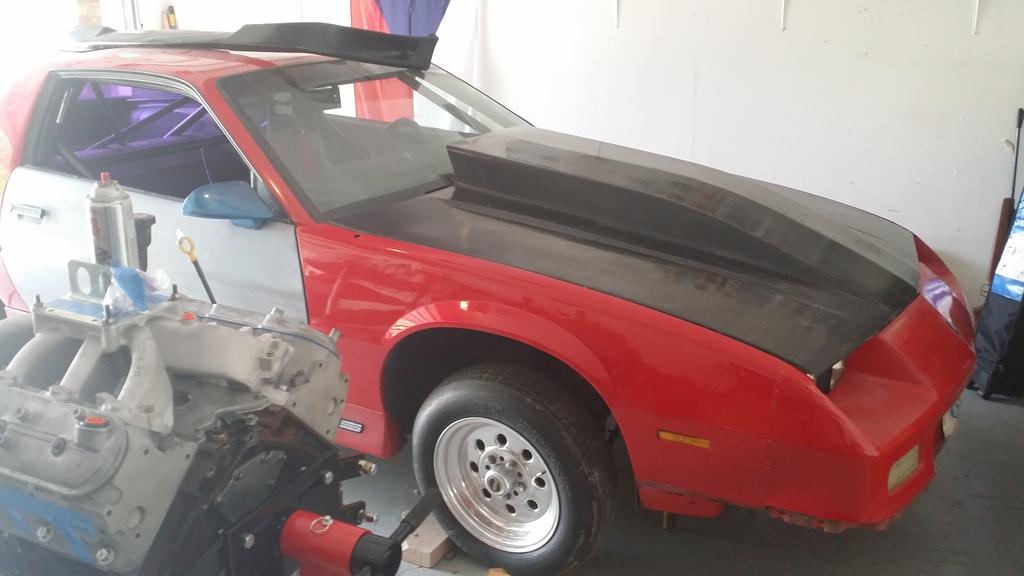
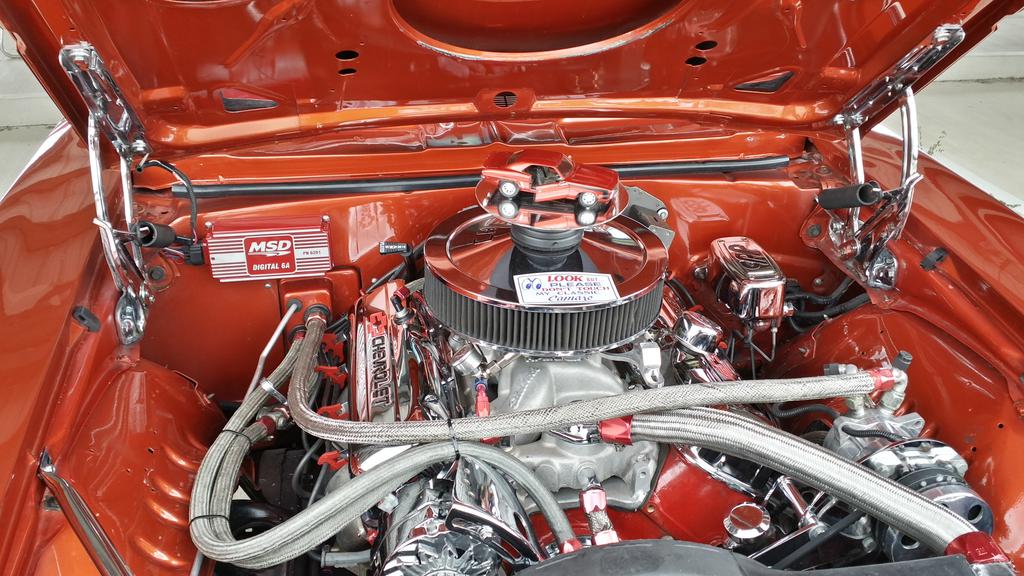
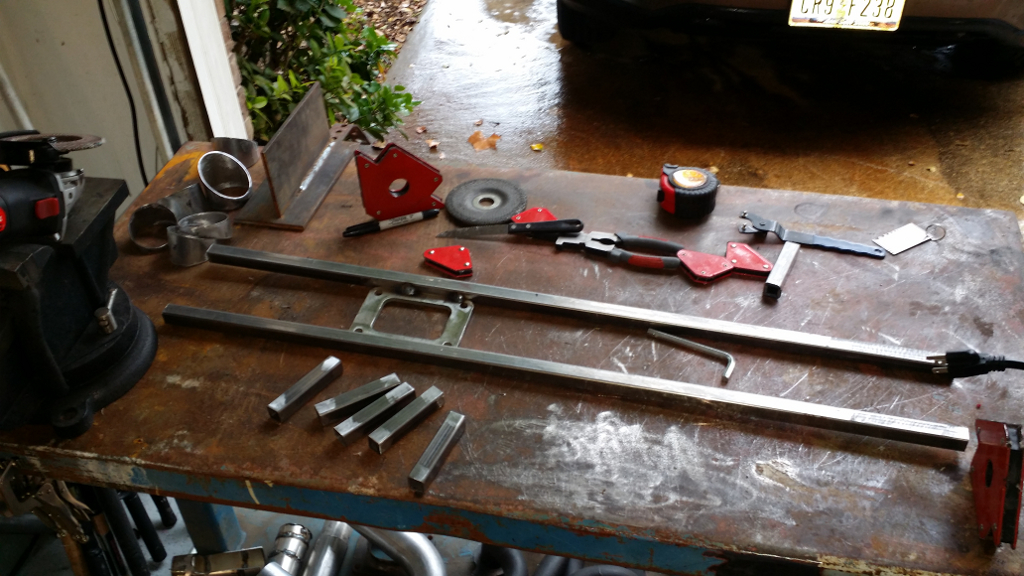
    The last post I had was me finishing up with the original manifolds and adding v-band flanges to them.   The next thing up is the bracket the T6 turbo is bolted to. I picked up some square tubing and made a bracket for it, along with some tubing and a mandrel bend.  Not pictured is the 3/4″ T6 flange, T6 form and 2.5″ -> 3″ merge.  I’ll take better pics of the turbo bracket with the T6 form and merge pipe tack-welded on.


    20141115_101926_resized

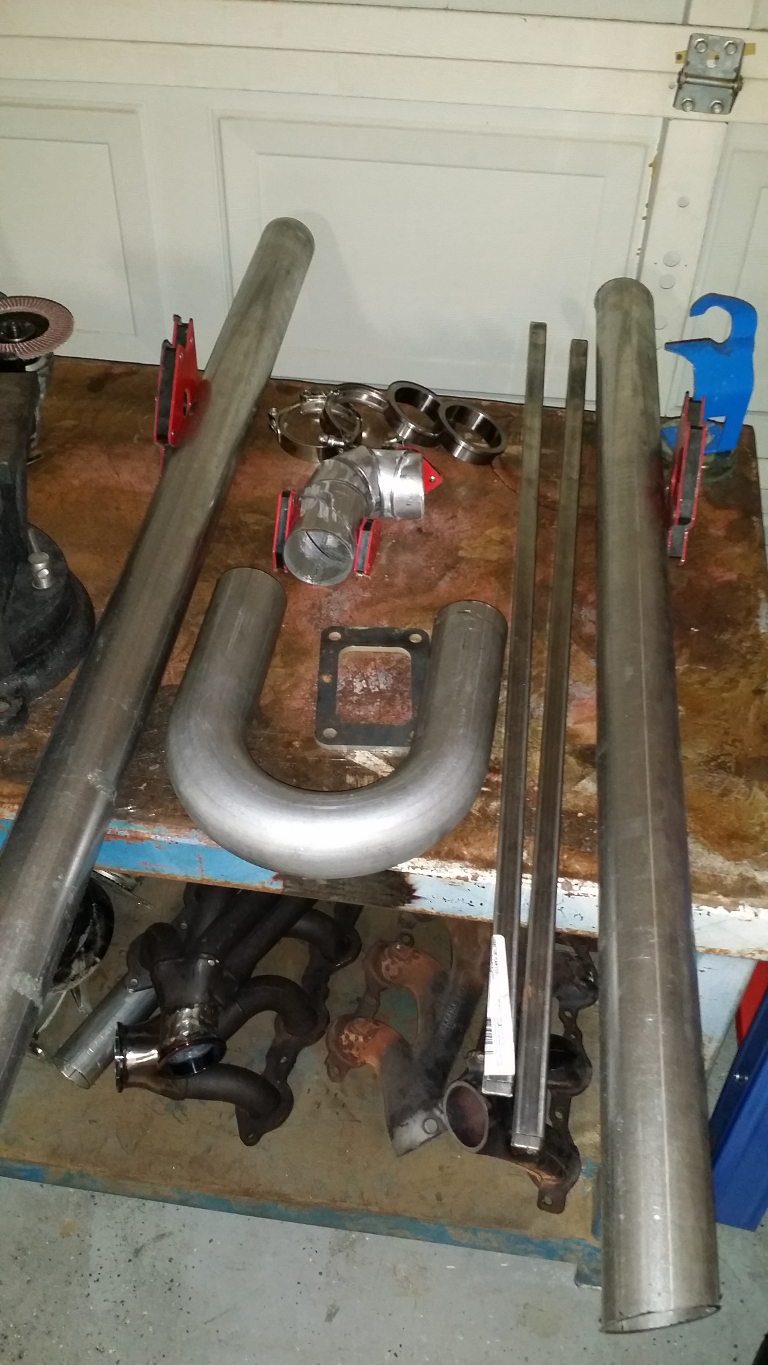
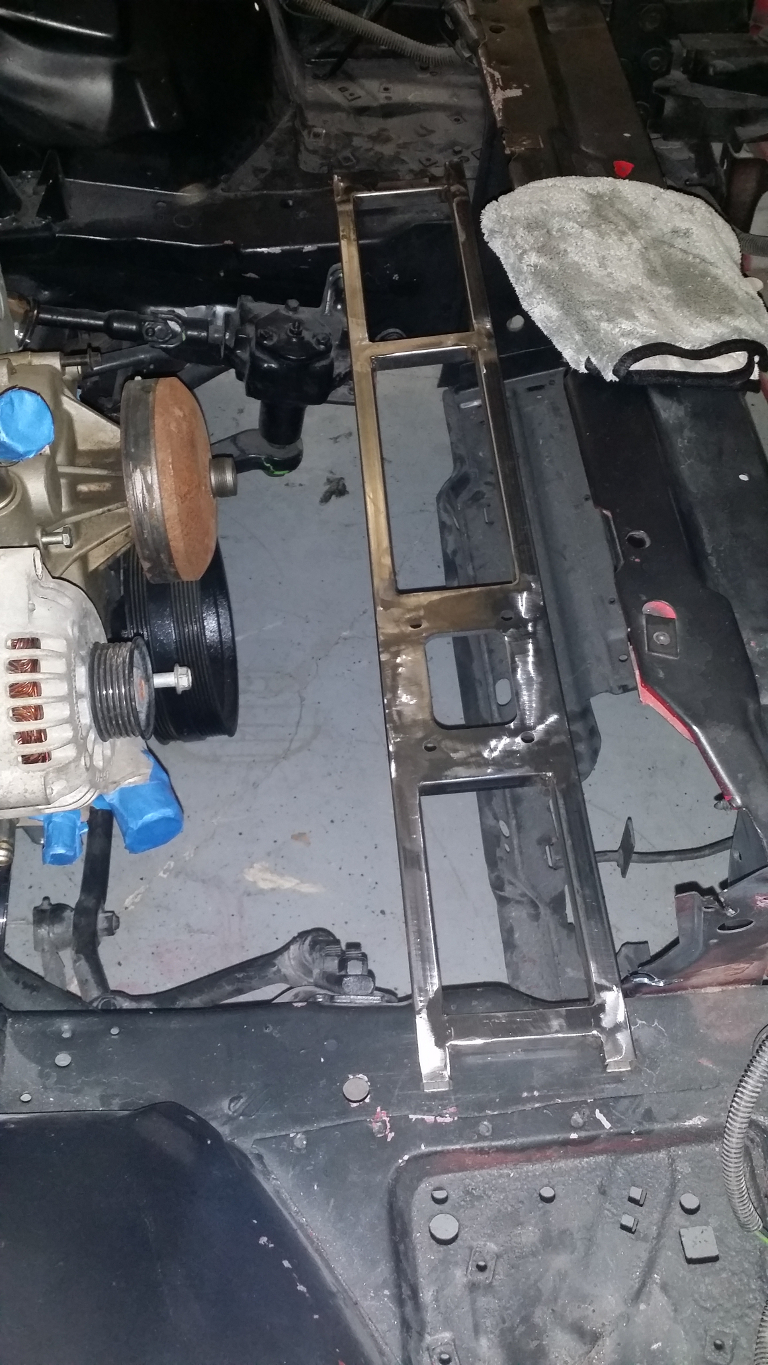
    I had to use (1) 1/4″ T6 flange and (1) 3/4″ T6 flange, kinda pancaking the two on top of each other because the turbo hit the bracket since I flush-mounted the 1/4″ T6 flange…I needed a little more than a 1/4″ clearance so I just added 3/4″ to make sure I had ample room.

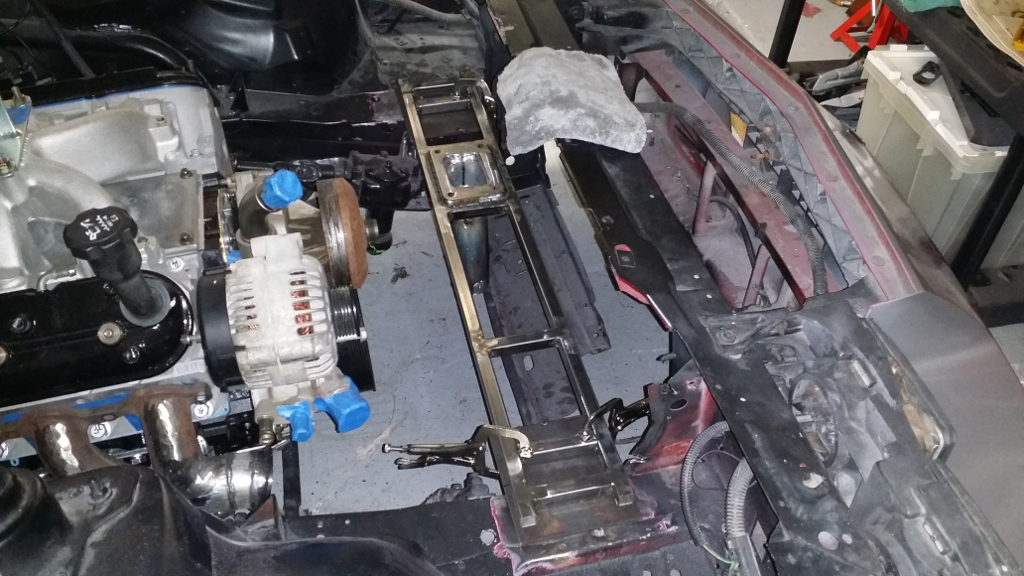
    Turbo bracket being fabbed up..

    20141115_151633_resized 20141115_160710_resized

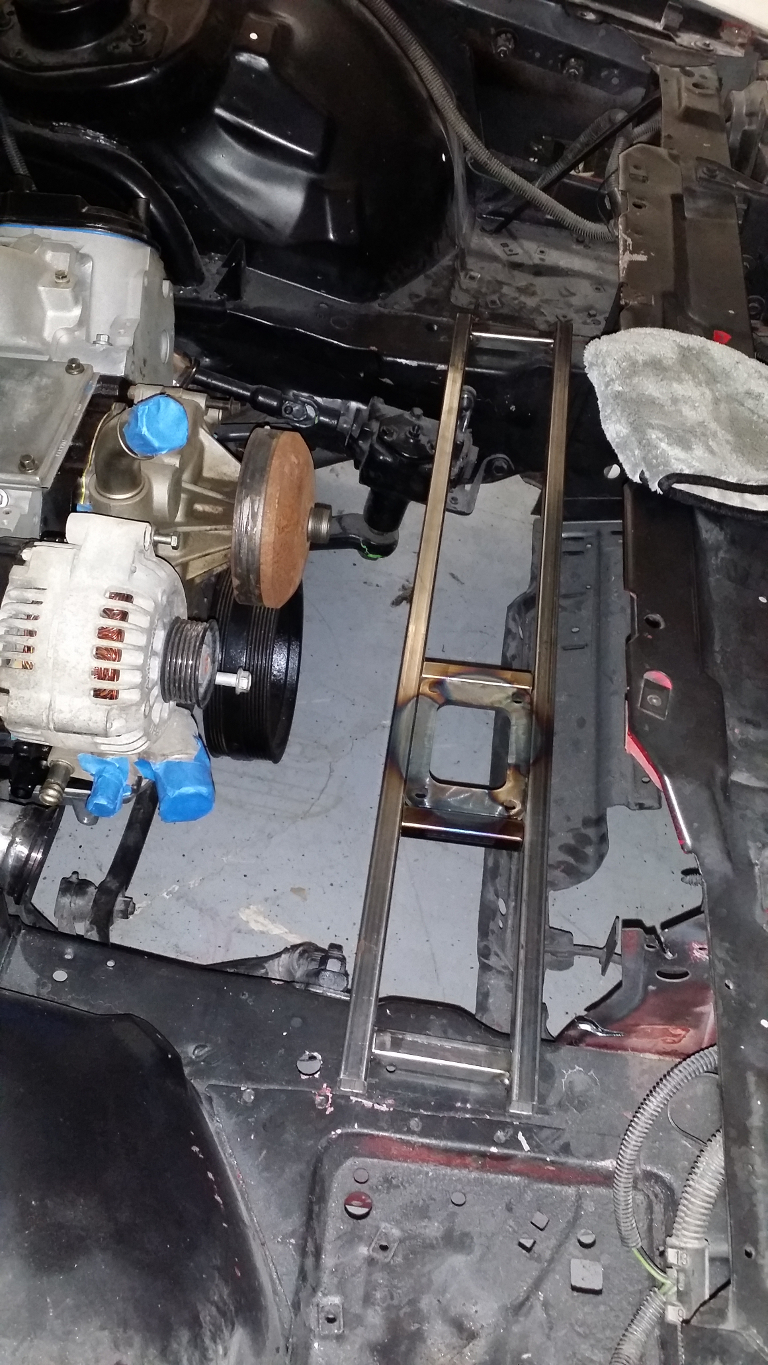
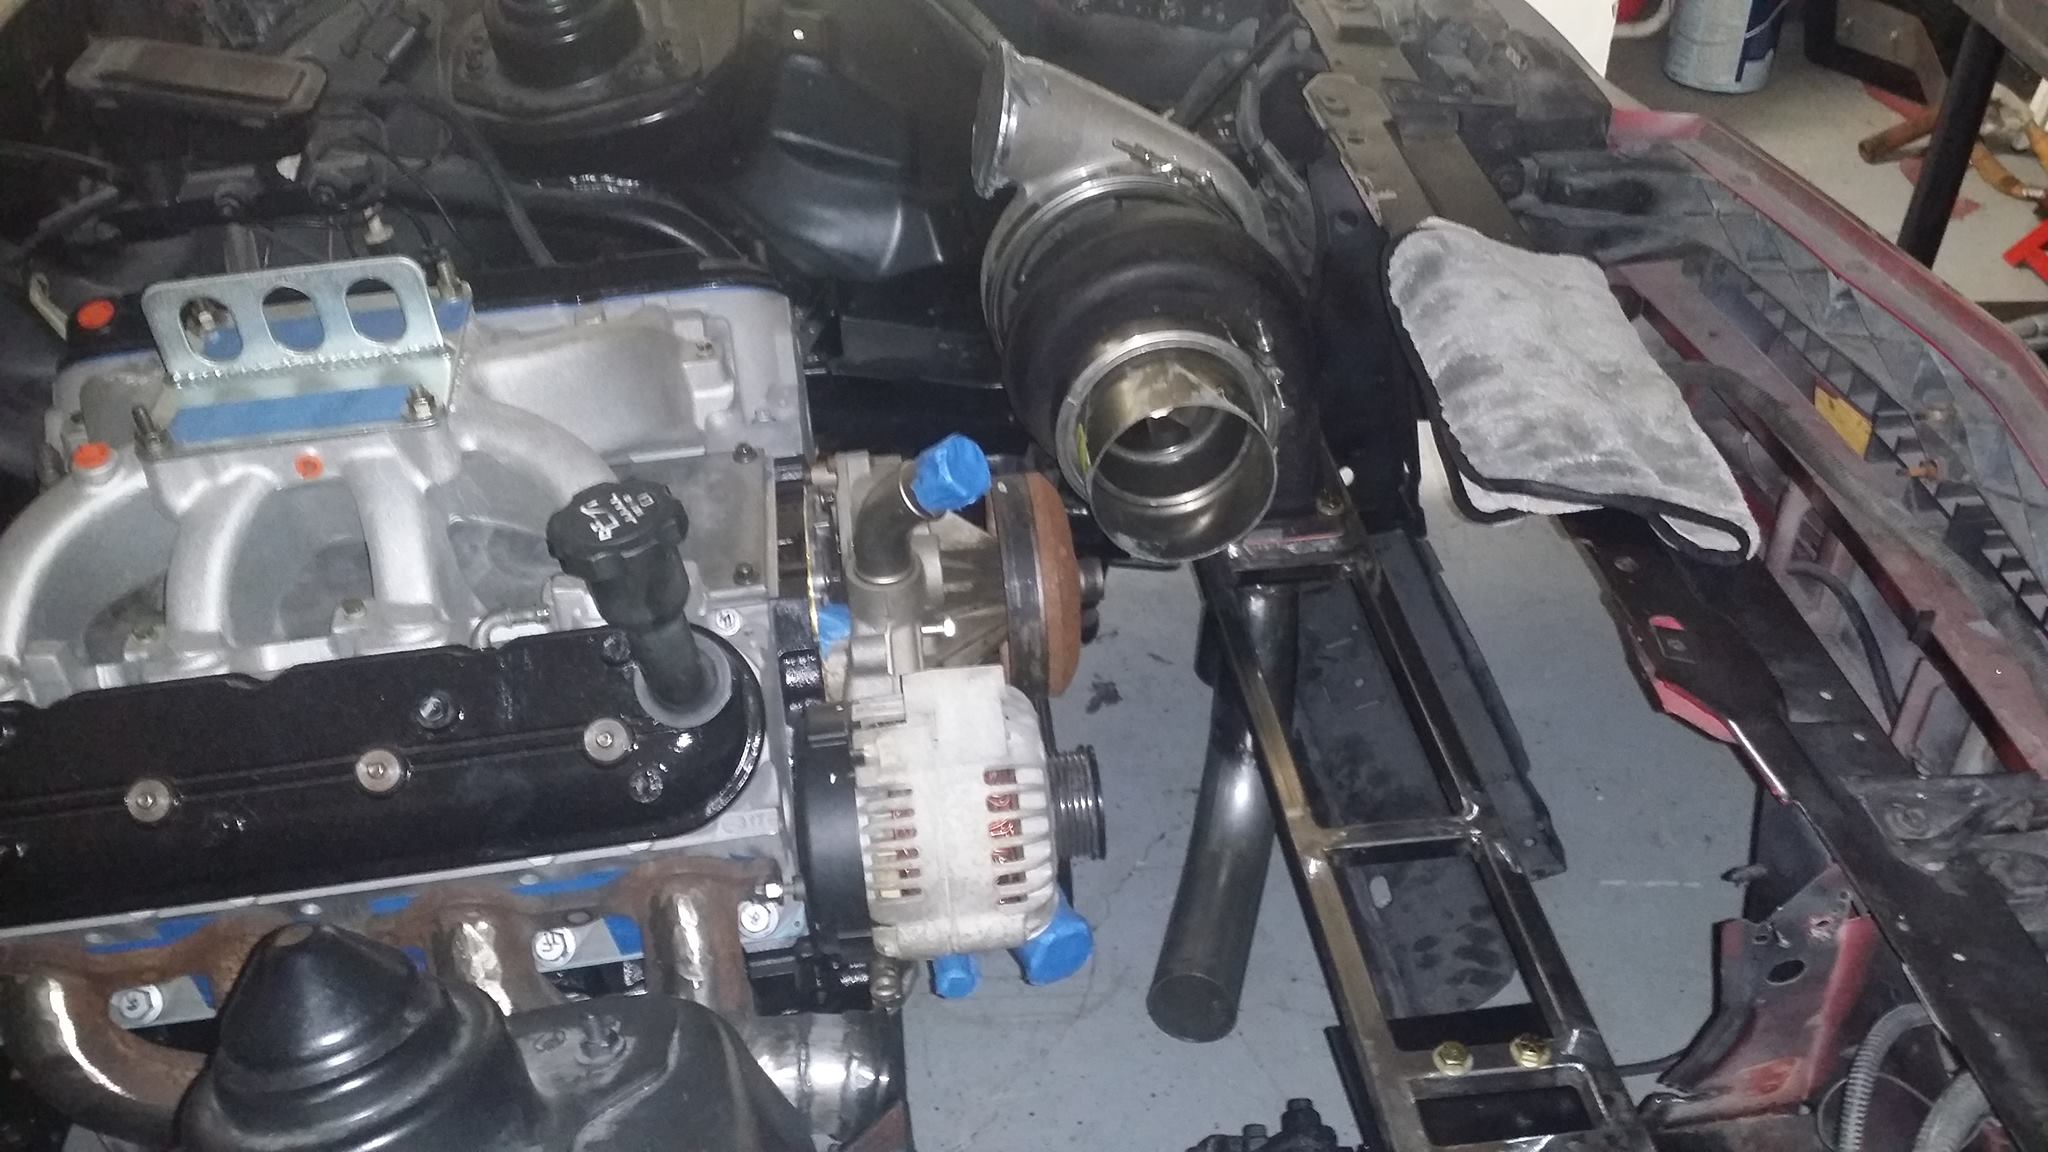
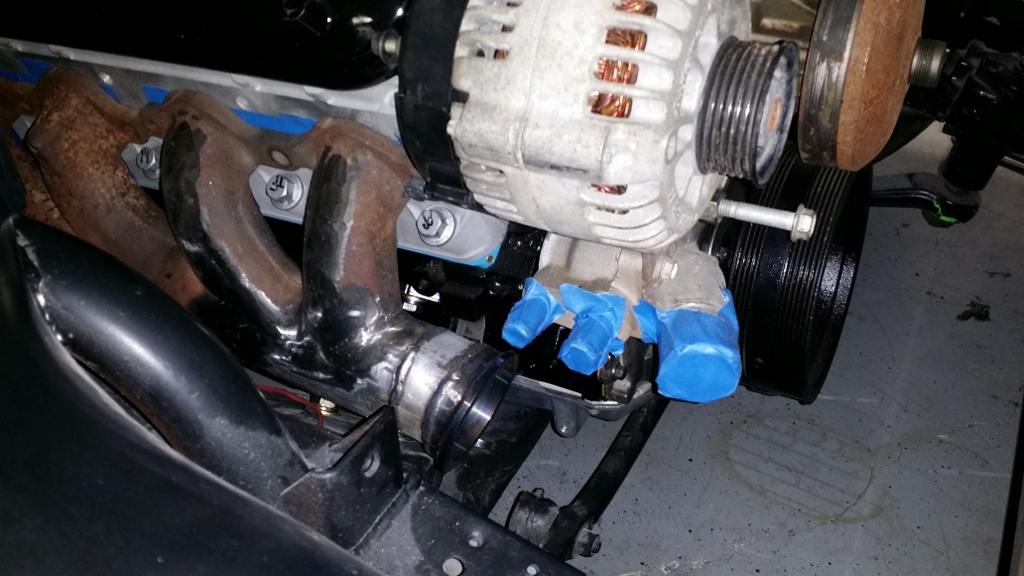
    Here’s the turbo bracket with the 1/4″ T6 flange flush mounted.  If you notice, I have the turbo to be mounted on the passenger side.  Little did I know that this wouldnt work unless I did some cutting where the turbo bracket butts up to the radiator “bracket/frame”.

    20141116_191313_resized

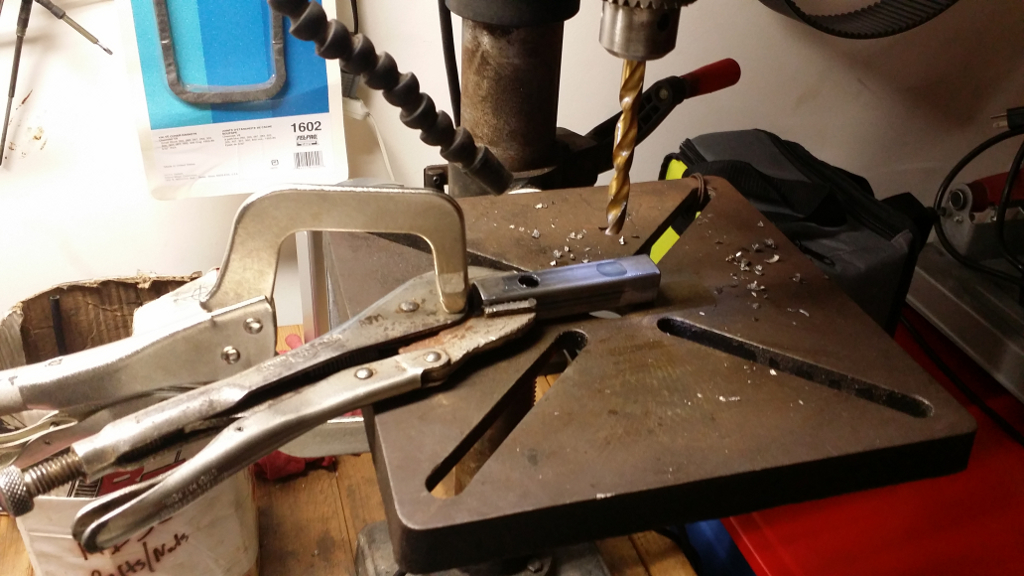
    Had to drill 2 holes in the square tubing on the turbo bracket.  I didnt want the bracket permanently mounted in the Camaro, just in case I one day wanted to run a twin turbo setup or something.. That drill press is a Craftsman 12″ that I picked up off of Craigslist for $90.  Damn thing is $179 from Sears.  Good deal there.

    20141129_185825_resized

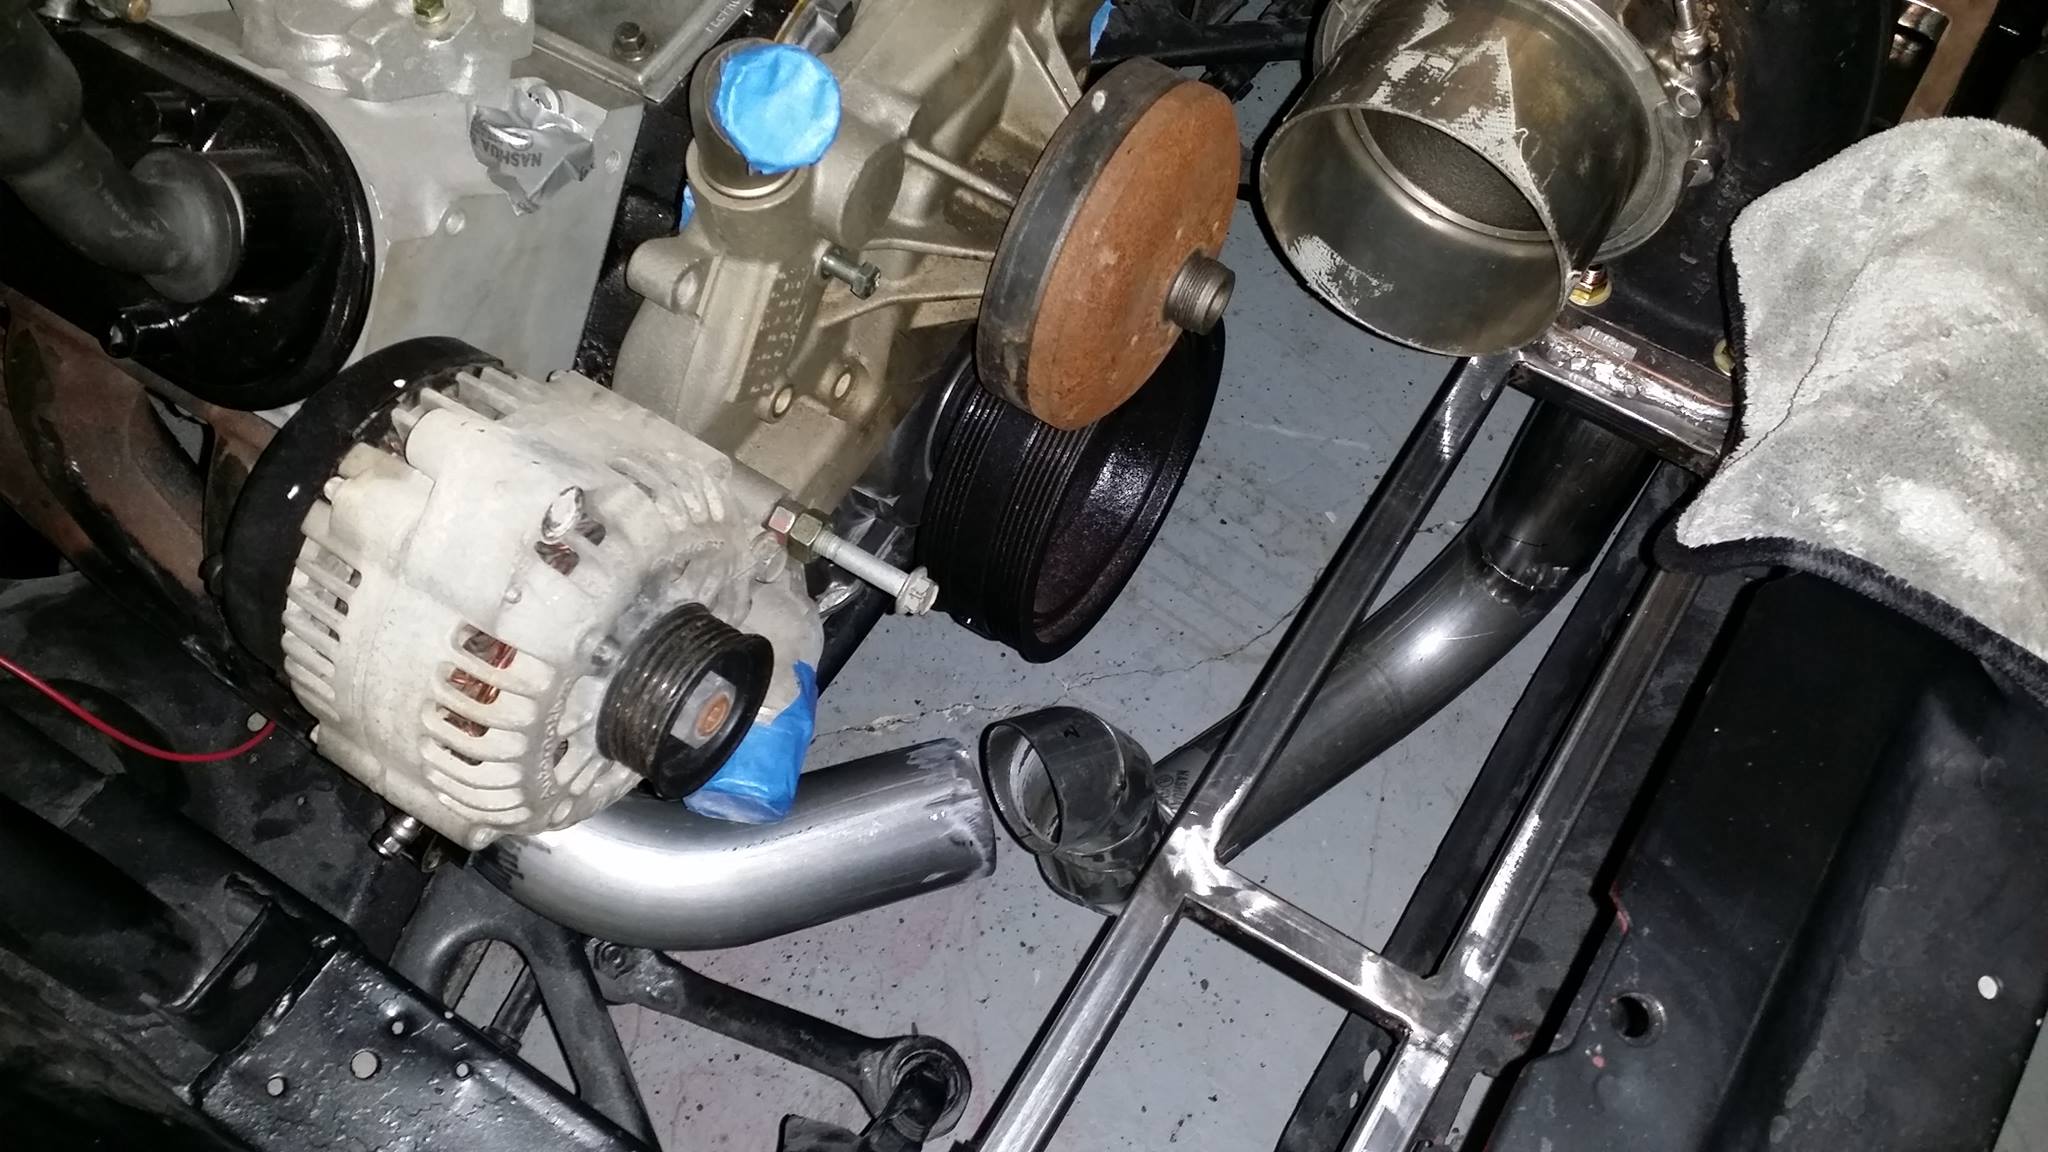
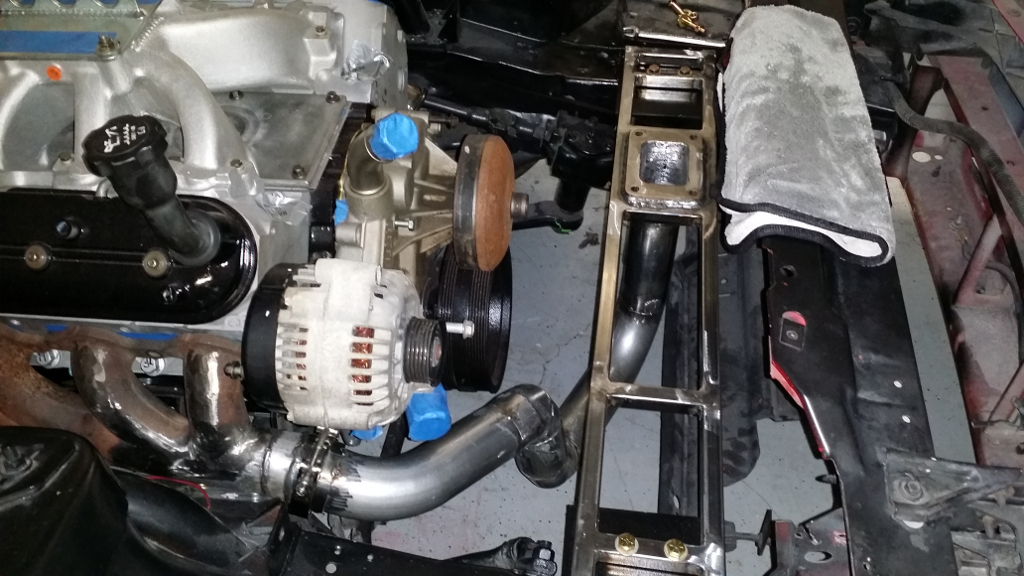
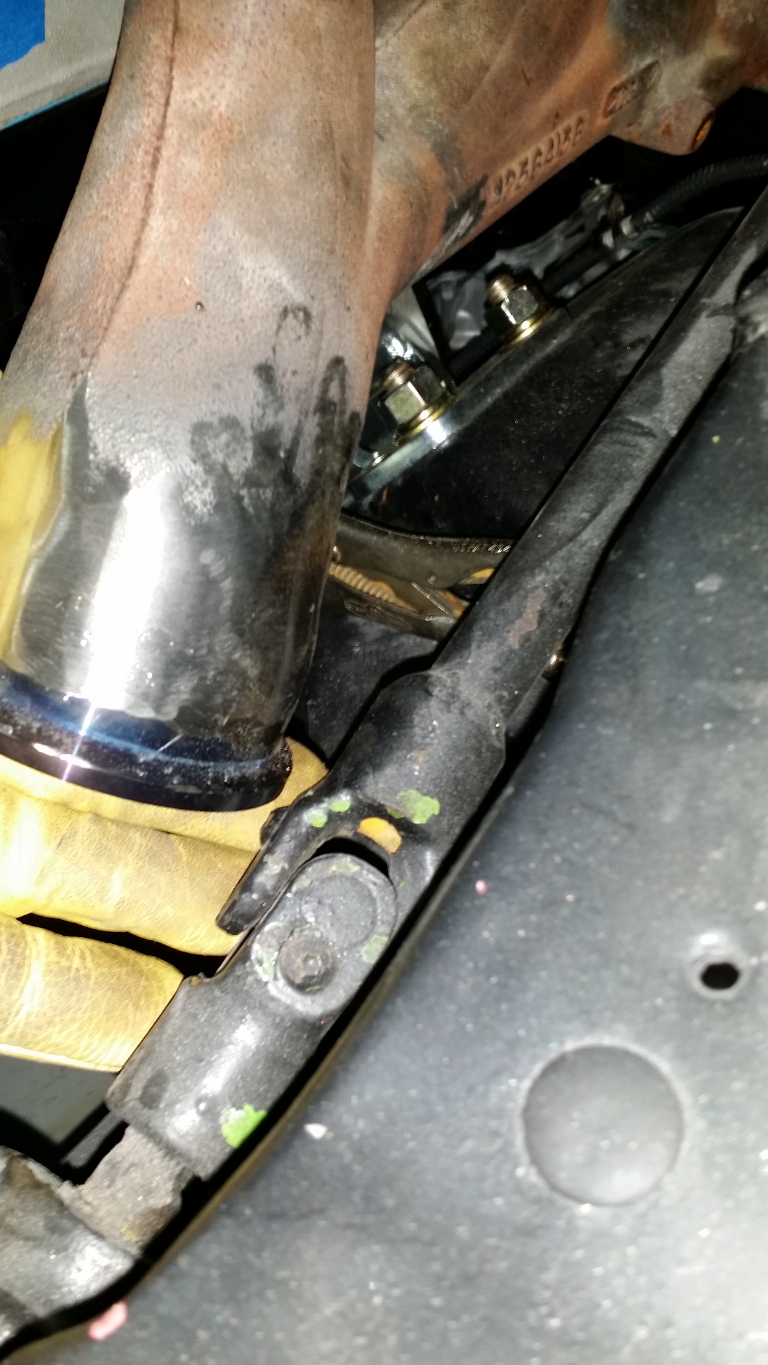
    If you look at the ends of each turbo bracket, you’ll see a square steel plate.  Thats where the bracket will be bolted to.  I tack-welded it in place then clamped it to get a rough guesstimate where it would be bolted to.  Look closely at the T6 flange where the turbo is mounted.  You’ll see that I had welded the 3/4″ T6 flange on top of the 1/4″ flange I had welded flush there.  Also ended up mounting the turbo on the drivers side since I have very little room on the passenger side and didnt want to do any cutting.

    20141129_193625_resized

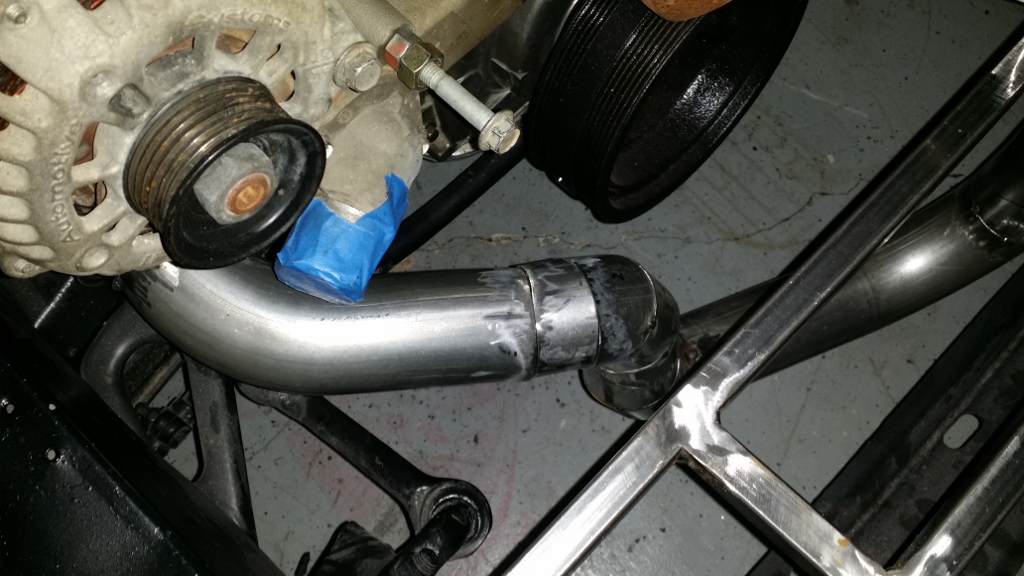
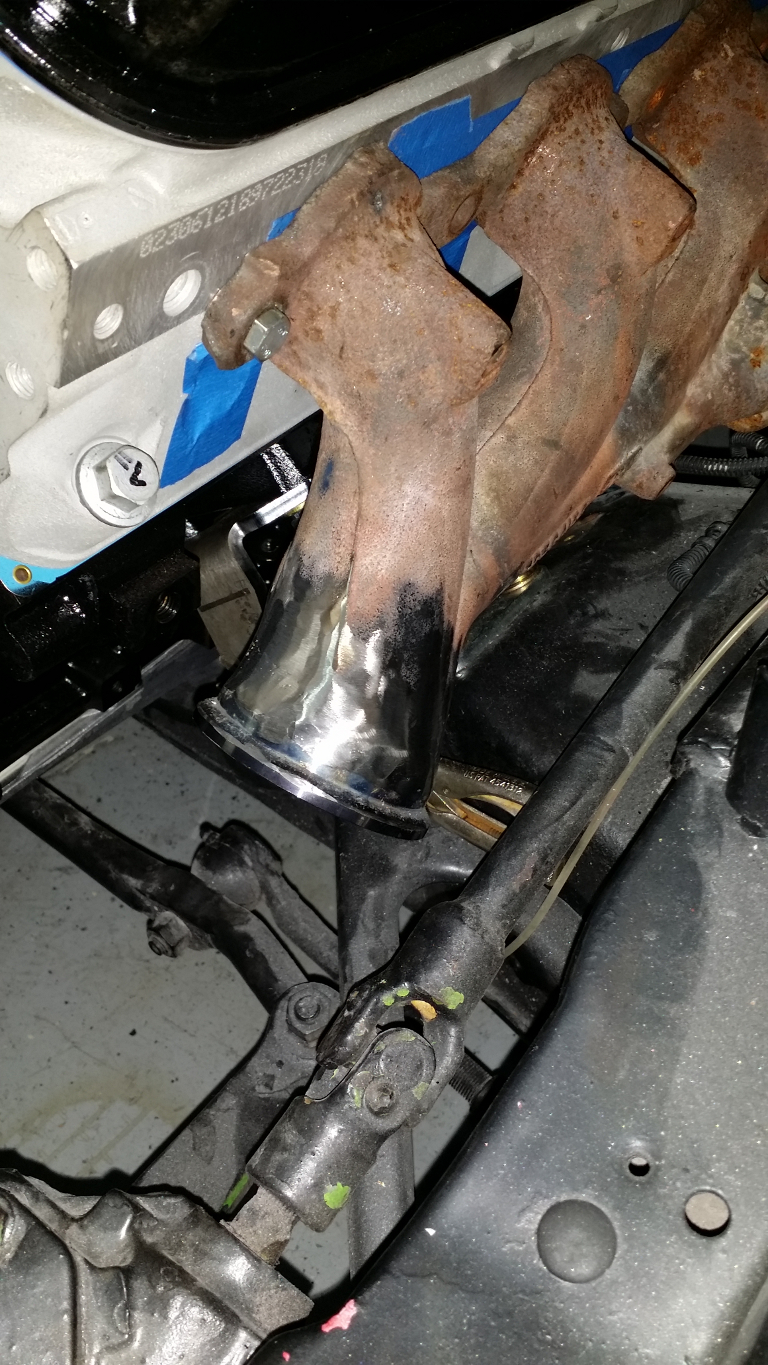
    Here’s the T6 turbo bolted down to the bracket, along with the bracket bolted down to the 1/4″ square tubing thats tack-welded to the frame.  Just need the drivers side exhaust to the merge tubing, then its either the rest of the hot side to the exhaust or from the turbo to the carb hat.

    1537834_10205380351853408_7267704697645128000_o 10750034_10205380352933435_7694448449585351914_o

    1781000_10205386577329041_5868946295085609737_o

    20141204_17382220141204_183334


  • More work on the passenger side turbo manifold

    Well I noticed my engine wasnt as far back as it should have been.  After fixing that, my passenger side manifold hit the k-member.  So its time to modify the manifold.  I ended up picking up some 2.5″ exhaust tubing then cutting and grinding it to fit the notch I made in the manifold.  Its not done yet and needs more grinding and molding before the final weld.  As you can see, it fits well and should work perfectly.


    20141103_182135_resized 20141104_164759_resized 20141104_165311_resized 20141104_165435_resized 20141104_183056_resized 20141104_183624_resized


  • Engine and transmission install, fab work started.

    Very productive day off.  I installed the LQ4 and a gutted TH400 that way I can tighten the LS adapter plates and also the BMR TH400 3rd Gen Camaro crossmember.   After installing the engine I went to bolt the crossmember in.  No dice.  Cant get the engine/trans far back enough to bolt it on.  The original crossmember is maybe 1/4″ off if even that much, so I’m going to add some steel plate to it and bolt the transmission to it.   The JBA shorty headers I modified, well the drivers side hits the steering shaft.  I could modify it but it would take some time and I dont think I’m really gaining much HP over the stock modified manifolds.  Even though I’m going to use the stock modified truck manifolds, the drivers side didnt have enough clearance as it was close to the steering knuckle, so I had to shorten and re-weld the v-band flange to it.   After I modify the crossmember, I’ll put a pic up.   On to progress pics..


    Engine and trans going in all at once.  In this pic I’m holding the trans up to install the crossmember.

    20141030_105738

    The gap between the Dirty Dingo EZ LS Conversion mounts and the Moroso solid motor mounts will need to be fixed.  I’m going to pick up some steel round tubing or have a friend of mine cut some for me.  Until I get that round steel tubing cut, I have vise grips holding the bolt from sliding.

    20141012_170845_resized


    Truck manifold with v-band flange added.  I basically did this before I had the engine in, otherwise it wouldnt have been an issue and I would have known to cut it shorter.  As it looks in the pic, way too close to the steering shaft knuckle.  Will not have room for the v-band clamp.

    20141030_153923


    Modified truck manifold and I angled it a little towards the engine.
    20141030_180044


    Full shot of engine in with both manifolds.

    20141030_180448


  • Modifying manifolds for the turbo kit

    Picked up a Hobart Handler 210MVP welder and decided to put my welding lessons to use.  My truck manifolds had 2 cracks in them and a hole that I accidentally created when cleaning up bosses.   So I welded up the hole, blended it in and then fixed the 2 cracks.  I’ll blend those in also and add v-bands to them.   Then I picked up a set of JBA shorty headers, cut off the flanges and welded some v-band flanges on them.   Most likely I’ll use the JBA headers but I figured I’d modify both just for the heck of it.  In a few weeks I’ll start on turbo placement in the Camaro and fabbing up the piping.  Plenty of pics to come!


    20141022_200424   20141006_20553720141022_18324820141020_193340


    This is the truck manifold welded and blended.  The second pic on the right is the headers (need to add more weld and blend it that way it looks better), then the finished truck manifolds with v-bands.

    20141023_174535 20141023_184329


  • Port Flow Calculator for a SuperFlo SF600

    Kendrick Automotive, a local shop that builds my engines, has a SF600 Flowbench.  They had some software written years back in DOS that would take the values from a SF600, compute various things like Previous CFM and Current CFM (meaning, after porting) and would print out results showing % Gain and then Exhaust to Intake ratio which is awesome to have when designing a custom cam.  Well their hard drive with the software decided it was about done working and that was it.  No backups.  All gone.    Well, in the real world, I’m a UNIX Admin/WebLogic Admin/Software Engineer.  So I decided it was something I could throw together pretty quick under Linux and built a Port Flow Calculator.   Basically the summary above tells you what input it takes.  It will generate a printout  (see screenshot) of the results that you can give your customer.  All heads flowed are saved to a database for later re-printing or reviewing.  Its Freeware/Emailware.  Basically, if you use it, tell me “Hey Alex, thanks..your stuff works!” and thats about it.  If you find a bug, email me and I’ll fix it.  It runs under Linux because Windows sucks.    Here are a few screenshots.  Its just about done.  I need to add a small section where you can add your company name to it (second screenshot shows it incomplete) and it will show up on the report, then some minor tweaks.  Also a pic of the printout below (yea I know..I should have scanned it.. LOL).  I have some dummy data in there so the report might look a little hokey.

    LATEST UPDATE:

    Port Flow Calculator Released.


    pfc  calib_defaults add_customer flow_headpfc_printout


  • Paint booth after pics and welding class..

    Instead of paying someone to fab up my turbo kit, I decided to go to a quick class to teach me the basics of welding.  Starting with safety first, then torch.  Up next is plasma cutting, then arc welding, and finally MIG welding.  A friend of mine bought a new welder and let me borrow his Century 225 MIG welder, then I picked up a fairly heavy table that I will use to weld on.

    So here are some pics of my Camaro in various paint stages, then after, me using a torch and finally my welding area.   My welding area seems kinda small, then again, it’ll do for now.  The pics of my Camaro which are not on the trailer, but painted..its dusty.  The only clean pic is of it on the trailer.

    The color of my Camaro is called “Cosmic Silver”.  After a few weeks, I should have some pics of the turbo kit I’m fixing to fab up.


    20140909_151238_resized 20140909_151307_resized 20140923_152732_resized 20140928_174757 20140922_192138 20140923_152720 20140926_143118


  • New engine, new parts, time for paint!

    My rebuild of the LQ4 engine out of a 2005 Chevy HD pickup is complete.  I opted for just a stock rebuild and added a TU2 Cam from Speed Inc.  Yea..I could have done the 4340 crank, rods with forged dished pistons but I didnt.  This is just the first incarnation of this engine.   Next one will have the “good stuff” in it.   I ended up painting the block and valve covers..came out pretty good.  Shootin’ for 9’s in the 1/4.

    In addition to this, I picked up a 4″ Fiberglass Cowl bolt on hood from Liberty Fiberglass and saved a few bucks over buying a Harwood hood, also added a new chin spoiler which was almost as expensive as the hood.  The hood itself is a good piece for $285.  I used to have another Camaro, an ’85, which had a Harwood hood.  I dont see any difference in quality between these two, other than this one is cheaper.

    Now she’s off to the body shop for a paint job.  🙂


    resized-20140731_150307 resized-20140731_150659 resized-20140731_150755 resized-20140802_155652 resized-20140802_155719 resized-20140802_163307 resized-20140805_121312


  • 2nd Annual SA Gear Grinders Swap Meet & Car Show

    The 2nd Annual Swap Meet and Car Show was held at the Tree of Life Church off of IH35.   I didnt go last year…never heard of it.  There was a great turnout hotrod wise.  Swap Meet was had a few vendors there also.  It was covered parking for the hotrods and swap meet sellers.  Next year head on out there, its worth the visit.  For larger images, just click the pic.


    resized-20140628_102753 resized-20140628_102802 resized-20140628_102820 resized-20140628_102842 resized-20140628_102916 resized-20140628_102930 resized-20140628_102943 resized-20140628_102959 resized-20140628_103057 resized-20140628_103302 resized-20140628_103313 resized-20140628_103322 resized-20140628_103349 resized-20140628_103405 resized-20140628_103609 resized-20140628_103629 resized-20140628_103814 resized-20140628_103857 resized-20140628_103906 resized-20140628_103918 resized-20140628_104037 resized-20140628_104053 resized-20140628_104727 resized-20140628_104747 resized-20140628_104759 resized-20140628_104847 resized-20140628_104859 resized-20140628_104919 resized-20140628_104952 resized-20140628_105008 resized-20140628_105133 resized-20140628_105141 resized-20140628_105236 resized-20140628_105340 resized-20140628_105350 resized-20140628_105501 resized-20140628_105507 resized-20140628_105555 resized-20140628_105607 resized-20140628_105712 resized-20140628_105736 resized-20140628_105755 resized-20140628_105931 resized-20140628_105940 resized-20140628_110018 resized-20140628_110035 resized-20140628_110043 resized-20140628_110059 resized-20140628_110149 resized-20140628_110214 resized-20140628_110231 resized-20140628_110641 resized-20140628_110646 resized-20140628_110658 resized-20140628_110707 resized-20140628_110723 resized-20140628_110741 resized-20140628_110753 resized-20140628_110800 resized-20140628_110822 resized-20140628_110844 resized-20140628_110903 resized-20140628_110934 resized-20140628_111132 resized-20140628_111142 resized-20140628_111156 resized-20140628_111226 resized-20140628_111334 resized-20140628_111354 resized-20140628_111409 resized-20140628_111422 resized-20140628_111441 resized-20140628_111459 resized-20140628_111532 resized-20140628_111549 resized-20140628_111635 resized-20140628_111647 resized-20140628_111714 resized-20140628_111723 resized-20140628_111742 resized-20140628_111747 resized-20140628_111759 resized-20140628_111817 resized-20140628_111841 resized-20140628_111946 resized-20140628_112049 resized-20140628_112159 resized-20140628_112209 resized-20140628_112243 resized-20140628_112322 resized-20140628_112332 resized-20140628_112424 resized-20140628_112533 resized-20140628_112545 resized-20140628_112834 resized-20140628_112846 resized-20140628_112901 resized-20140628_113008 resized-20140628_113014 resized-20140628_113030 resized-20140628_113046 resized-20140628_113057 resized-20140628_113107 resized-20140628_113111 resized-20140628_113540 resized-20140628_113600 resized-20140628_113641 resized-20140628_113647 resized-20140628_113729 resized-20140628_113750 resized-20140628_114035


  • New Braunfels Texas Swap Meet

    One of my favorite swap meets is coming up and its a big one.  April 18-20, 2014

    Comal County Fairgrounds
    801 E Common St.
    New Braunfels, TX 78130

    New Braunfels Swap Meet Website

    • April 18-20, 2014: No Car Show on Easter Sunday
    • 8:00 AM to dusk
    • 1,000+ spaces of hard-to-find car parts and related items
    • Food and drink concessions
    • ATM at Fairgrounds
    • Free parts hauling by swap meet volunteers
    • Round the clock security


    View Larger Map